
Proper laundry dryer vent installation is an important part of setting up and maintaining a clothes dryer. The vent system carries hot, moist exhaust away from the appliance and, for a conventional vented dryer, discharges it outdoors. A poorly routed, crushed, disconnected, blocked, or incorrectly sized vent can reduce airflow, increase drying times, and create safety concerns. The Consumer Product Safety Commission (CPSC) advises cleaning dryer vents and exhaust ducts periodically and replacing plastic or foil accordion-style ducting with appropriate rigid or semi-rigid metal ducting.
This guide explains laundry dryer vent installation, dryer vent hose installation, laundry dryer vent hose installation, and laundry dryer vent duct installation in practical terms. It covers planning the route, choosing appropriate materials, connecting the dryer, handling elbows and long runs, checking the exterior termination, recognizing airflow problems, and deciding when professional installation makes more sense. Always prioritize the installation manual for your specific dryer and the building codes applicable where you live; the International Residential Code also requires dryer exhaust systems to follow manufacturer instructions and provides requirements for duct construction, termination, support, and length.
1. What Is a Dryer Vent System?
A dryer vent system is the exhaust pathway that carries air and moisture from a vented clothes dryer to an exterior termination. It normally consists of the dryer’s exhaust connection, a short transition duct, the main exhaust duct, elbows or fittings where necessary, and an outside vent hood or termination. The complete route should allow air to move efficiently rather than forcing the dryer to push exhaust through unnecessary bends, restrictions, or damaged sections.
The exact configuration varies according to the home’s construction and the dryer’s location. A dryer against an exterior wall may require only a short connection, while a dryer in an interior laundry room may require a longer duct route through a wall or ceiling. The 2024 IRC states that dryer exhaust systems should be independent and convey moisture to the outdoors, with an exception for listed and labeled condensing or ductless dryers.
A typical vent system includes:
- Dryer exhaust outlet
- Listed transition duct where required
- Main dryer exhaust duct
- Smooth, properly fitted elbows
- Mechanical connections or approved joints
- Exterior termination
- Backdraft damper where required
- Supports for longer duct runs
- Protective plates where the duct could be damaged by fasteners
- An unobstructed pathway for exhaust air
2. Before Starting Laundry Dryer Vent Installation
Planning the route before purchasing duct material can prevent many installation problems. Measure the distance from the dryer outlet to the exterior termination and determine how many changes of direction are required. Do not assume that the shortest-looking route is automatically acceptable; the dryer manufacturer’s installation instructions may specify limitations for duct diameter, length, elbows, and allowable configurations.
Whirlpool recommends a short, supported vent with very little slack behind the appliance. Its installation guidance also recommends heavy metal exhaust venting, generally 4 inches in diameter, and advises following the owner’s manual when selecting the venting system.
Before installation, check:
- Dryer make and model
- Dryer installation manual
- Existing wall or ceiling vent
- Exterior termination location
- Total approximate duct length
- Number of elbows
- Available clearance behind the dryer
- Whether the existing duct is crushed or damaged
- Whether the outside hood is accessible
- Whether the route passes through walls or ceilings
- Applicable local building requirements
- Whether a permit or inspection may be required
- Whether the dryer is electric or gas
- Whether the dryer is a conventional vented model or a ductless/condensing design
Important: If the project involves cutting through structural components, installing a new concealed duct route, modifying gas connections, or dealing with an inaccessible duct inside walls or ceilings, professional assistance may be appropriate.
3. Choose the Right Dryer Vent Material
The material used for the exhaust pathway matters because the duct must withstand the operating environment while maintaining effective airflow. Whirlpool recommends rigid or flexible heavy-metal venting and specifically warns against materials such as plastic or aluminum foil that can collapse or become crushed.
The 2024 IRC specifies that dryer exhaust ducts have a smooth interior and be constructed from metal meeting its stated thickness requirement, with a nominal 4-inch diameter. It separately addresses the transition duct between the dryer and exhaust system.

Rigid Metal Dryer Vent
Rigid metal duct can provide a relatively smooth airflow path and is particularly useful for permanent runs.
Advantages include:
- Smooth interior surface
- Strong resistance to crushing
- Suitable for permanent duct routes
- Easier to keep straight
- Less likely to sag than lightweight flexible material
- Useful for longer permanent sections
- Can create a clean, professional installation
Semi-Rigid Metal Vent
Semi-rigid metal transition duct provides some flexibility when connecting the dryer to the wall connection.
It can be useful when:
- The dryer needs slight positioning adjustment.
- The wall connection is not perfectly aligned.
- A short transition is necessary.
- The manufacturer permits the selected transition duct.
- The duct can remain accessible rather than concealed.
The specific transition product should be listed and labeled for dryer applications when required by applicable code. The 2024 IRC limits a transition duct to a single length of no more than 8 feet and prohibits concealing it within construction.
4. Laundry Dryer Vent Hose Installation
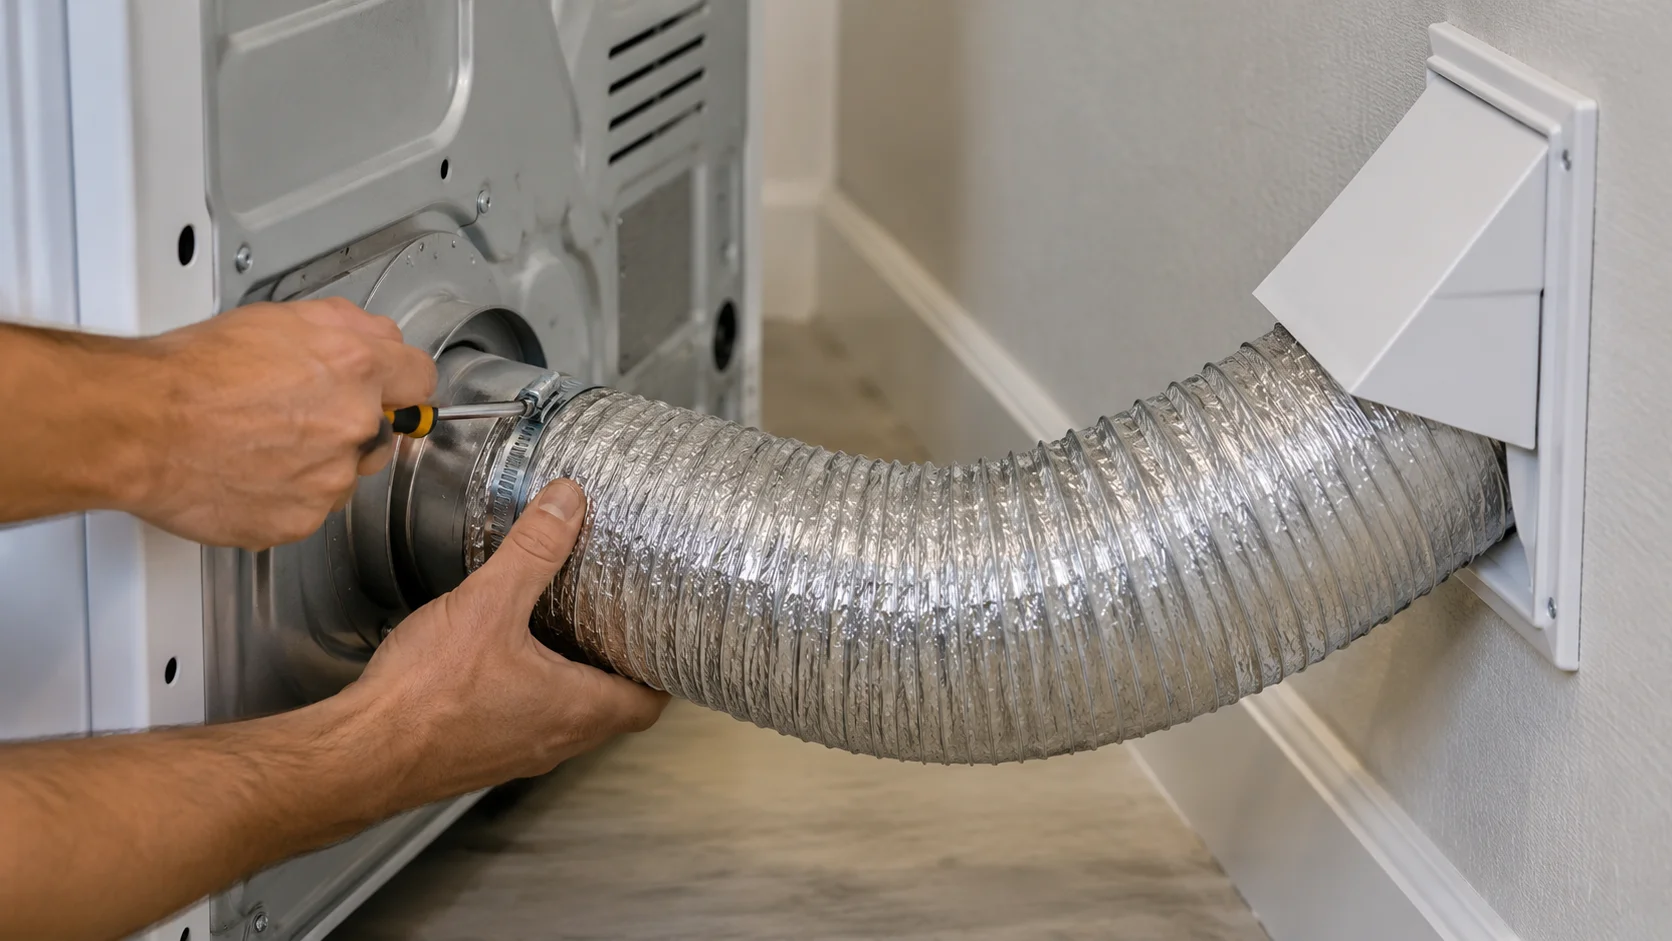
The dryer vent hose installation at the back of the appliance may look simple, but this short section can have a major effect on airflow. A hose that is too long, sharply bent, crushed behind the dryer, or loosely attached can restrict exhaust.
Whirlpool recommends keeping the vent short and avoiding unnecessary slack. It also advises repositioning the dryer carefully so the duct does not become kinked or crushed when the appliance is moved back into place.
For a proper connection:
- Turn off and disconnect the dryer according to the manufacturer’s instructions.
- Inspect the dryer exhaust outlet.
- Inspect the wall connection for damage or blockage.
- Measure the required transition length.
- Avoid creating unnecessary loops.
- Keep the transition duct as straight as practical.
- Attach the duct securely at both ends.
- Use approved clamps or foil tape as specified by the manufacturer.
- Do not use ordinary duct tape as a substitute for appropriate dryer-vent connection methods.
- Do not use screws that protrude into the airflow path.
- Check that the duct is not pinched behind the appliance.
- Leave the appliance positioned according to the manufacturer’s clearance requirements.
- Make sure the connection remains accessible for inspection.
- Verify the duct is not rubbing against sharp edges.
- Check airflow after the installation is complete.
Whirlpool specifically notes that foil tape is designed for the temperatures associated with dryer venting and warns against alternatives such as duct tape. It also advises avoiding protruding screws because lint can snag on them and accumulate.
5. Laundry Room Dryer Vent Installation
The layout of the laundry room can determine how straightforward the installation will be. A dryer positioned against an exterior wall may have a short exhaust path, while a dryer located in the center of a home may require a longer route to reach an outside wall.
For laundry room dryer vent installation, focus on creating a direct, supported route that complies with the dryer manufacturer’s instructions and local requirements.
A practical planning sequence is:
- Identify the dryer’s final position.
- Locate the dryer’s exhaust outlet.
- Find the nearest suitable exterior termination point.
- Measure the proposed duct route.
- Identify every required elbow.
- Check whether the route can remain accessible.
- Select compatible duct components.
- Install the permanent ductwork according to applicable requirements.
- Connect the dryer with an appropriate transition duct.
- Check the exterior termination.
- Operate the dryer.
- Confirm that exhaust is leaving the exterior termination.
- Look for signs of restricted airflow.
- Recheck the connection after positioning the dryer.
- Schedule professional inspection when the installation is complex or concealed.
The International Residential Code states that dryer exhaust should be independent and terminate outdoors, while the exact installation must follow the manufacturer’s instructions.
6. How to Route a Dryer Vent Duct
A good dryer exhaust route is generally as direct as the installation allows while remaining compliant with the appliance instructions and applicable code. Every unnecessary bend can add resistance to airflow. Whirlpool specifically recommends using the shortest vent length possible and as few 90-degree elbows as possible.
When planning the route:
- Keep the duct as straight as practical.
- Avoid unnecessary turns.
- Use properly shaped elbows rather than sharply bending the duct.
- Do not crush or flatten the duct.
- Do not reduce the duct diameter unless specifically permitted by the manufacturer and applicable requirements.
- Support permanent duct sections appropriately.
- Keep joints properly aligned.
- Seal joints according to the applicable installation requirements.
- Avoid protruding fasteners inside the duct.
- Protect concealed ducts from accidental penetration where required.
- Keep the route accessible when possible.
- Follow the manufacturer’s maximum allowable length.
- Account for elbows when determining effective duct length.
- Make sure the final termination remains unobstructed.
- Do not route dryer exhaust into an attic, crawl space, or other interior area.
The 2024 IRC requires dryer exhaust ducts to be supported at intervals no greater than 12 feet and provides methods for calculating maximum duct length and equivalent lengths for fittings. However, the code also states that the dryer manufacturer’s instructions determine size and maximum length where applicable.
7. Laundry Dryer Vent Duct Installation and Maximum Length
There is no universal answer to the question, How long can a dryer vent be? because the permitted length can depend on the dryer manufacturer’s specifications, the number and type of fittings, the installation method, and the applicable code.

The 2024 IRC provides a specified maximum exhaust duct length of 35 feet when its specified-length method applies, with reductions for fittings. It also provides a manufacturer-instruction method. For example, the code’s table assigns equivalent lengths to certain elbows, meaning a route containing fittings cannot simply be treated as the same as a straight duct of identical physical length.
This is why you should not use a simple rule such as every dryer can have a 35-foot vent.
Instead:
- Read the dryer’s installation manual.
- Identify the manufacturer’s maximum permitted duct length.
- Determine the duct diameter specified for your model.
- Count elbows and fittings.
- Check the applicable local code.
- Consider whether the route is concealed.
- Avoid unnecessary length.
- Keep the route straight where practical.
- Use compatible fittings.
- Do not install an improvised booster fan unless the complete system is specifically designed and listed for that application.
- Have complicated long runs evaluated by a qualified professional.
The 2024 IRC specifically prohibits domestic booster fans in dryer exhaust systems under its dryer-exhaust provisions.
8. Dryer Vent Elbows and Bends
Elbows are sometimes unavoidable, especially when a dryer sits close to a wall or the duct must change direction. The problem is not simply the presence of an elbow; the total configuration affects airflow.
Whirlpool notes that each bend and curve can reduce airflow and recommends using as few 90-degree elbows as possible.
When elbows are necessary:
- Use the correct diameter.
- Avoid sharp homemade bends.
- Keep the transition connection short.
- Use appropriately designed fittings.
- Avoid unnecessary back-to-back turns.
- Keep joints secure.
- Check the interior for protruding fasteners.
- Support permanent ductwork properly.
- Account for fitting length when calculating the route.
- Follow the dryer’s installation instructions.
- Do not force the dryer into a position that bends the transition duct.
- Recheck the route after moving the appliance.
- Inspect bends for lint accumulation during maintenance.
- Avoid flattening the duct around corners.
- Consider professional installation for complicated routes.
The 2024 IRC provides specific equivalent-length values for different elbow configurations, reinforcing the importance of accounting for fittings rather than measuring only the straight-line distance.
9. Where Should a Dryer Vent Terminate?
A conventional dryer exhaust system should discharge outdoors. The exterior termination needs to remain open enough to allow exhaust to escape and should be installed according to the dryer manufacturer’s instructions and applicable building requirements.
The 2024 IRC states that dryer exhaust duct terminations should be outside the building and equipped with a backdraft damper. It also specifies clearance requirements where the manufacturer’s instructions do not provide a termination location.
The outside vent should:
- Discharge to the exterior.
- Have an unobstructed passage.
- Open properly while the dryer operates.
- Remain free of lint buildup.
- Remain free of nests and debris.
- Have the required termination hardware.
- Follow manufacturer specifications.
- Meet applicable local code.
- Avoid being blocked by landscaping or other objects.
- Remain accessible for inspection and cleaning.
Whirlpool advises checking the exterior exhaust hood for restrictions and notes that the hood should have sufficient clearance from the ground or objects that could obstruct airflow.
10. Why You Should Never Vent a Dryer Into the House
A conventional vented dryer should not simply exhaust into a laundry room, basement, attic, crawl space, or wall cavity. The exhaust contains moisture and can contribute to poor indoor conditions, while improper exhaust routing can create serious safety concerns.
The International Residential Code requires dryer exhaust to be conveyed outdoors, except for listed and labeled condensing or ductless dryers covered by the stated exception.
An indoor exhaust arrangement can cause:
- Excess moisture
- Increased humidity
- Poorer indoor air conditions
- Lint accumulation
- Longer drying times
- Restricted airflow
- Potential damage to building materials
- Increased maintenance requirements
Whirlpool also recommends outdoor venting and explains that indoor venting can increase moisture-related concerns and affect air quality.
11. Dryer Vent Installation Safety
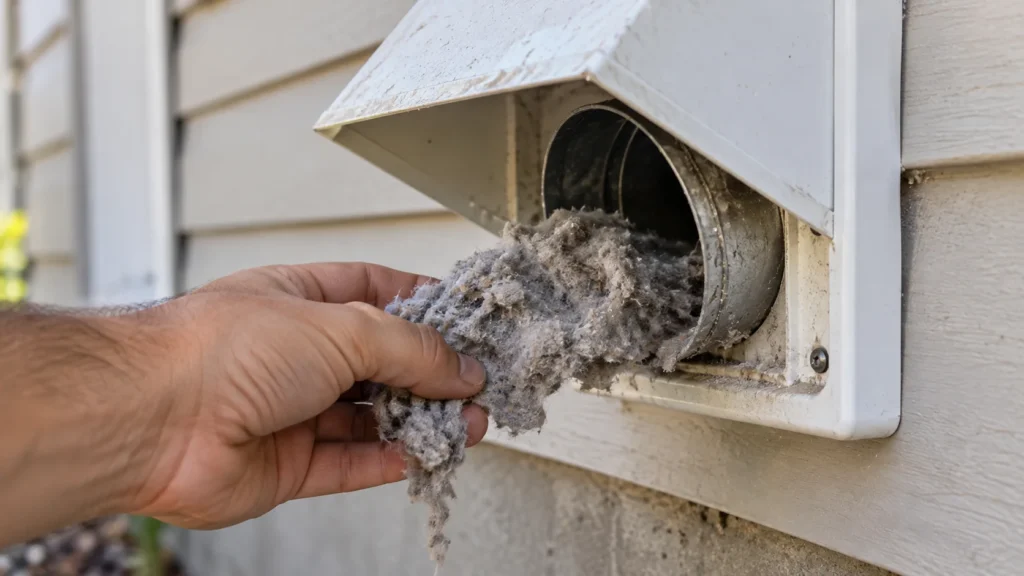
Dryer venting deserves attention because restricted exhaust airflow can contribute to overheating. The CPSC warns that lint can accumulate in the dryer and exhaust duct, restricting airflow and contributing to excessive heat buildup. It recommends cleaning the lint screen regularly and cleaning the dryer vent and exhaust duct periodically.
Important safety practices include:
- Clean the lint screen before or after each load.
- Inspect the vent when drying performance changes.
- Keep the exhaust path unobstructed.
- Check the exterior vent while the dryer is operating.
- Replace unsuitable plastic or foil accordion-style ducting.
- Do not operate the dryer with a disconnected exhaust duct.
- Keep the area behind the dryer clean.
- Avoid crushing the transition duct.
- Do not use protruding screws inside the duct.
- Keep combustible clutter away from the dryer.
- Have complex concealed ductwork inspected appropriately.
- Pay attention to unusual drying times.
- Investigate excessive heat or humidity around the dryer.
- Stop using the appliance if there is an obvious serious exhaust problem until it is corrected.
- Follow the manufacturer’s safety instructions.
CPSC estimates an annual average of thousands of clothes dryer fires and specifically recommends keeping lint filters clean, ensuring the exhaust pipe is not restricted, and cleaning the vent pipe at least annually.
12. Signs of a Bad or Restricted Dryer Vent
A dryer may continue operating even when its exhaust system is not functioning properly. Changes in drying performance can therefore provide useful warning signs.
Whirlpool identifies restricted airflow as a potential cause of long drying times and recommends checking the hose for kinks, crushing, excessive length, and lint buildup. It also advises checking the outside hood for obstruction.
Watch for:
- Clothes taking much longer to dry.
- Clothes remaining damp after a normal cycle.
- Excessive heat around the dryer.
- Unusually humid laundry-room conditions.
- Weak airflow at the exterior vent.
- A crushed hose behind the dryer.
- Visible lint around the exhaust connection.
- A blocked exterior vent flap.
- Lint or debris around the outside termination.
- A dryer displaying a vent-restriction warning.
- The dryer stopping unexpectedly on models with airflow protection.
- Unusual odors.
- Repeatedly poor drying performance after normal maintenance.
- Excessive lint around the appliance.
- A vent that has never been professionally inspected despite a long or concealed route.
A single symptom does not automatically prove that the vent is the cause, but these signs justify checking airflow and following the manufacturer’s troubleshooting instructions.
Jump into Other Related Article
- How to Remove Peanut Butter Stains
- Does Rayon Shrink?
- How to Remove Coffee Stains
- How to Clean Suede Shoes
- Best Stain Remover for Clothes
- How to Clean Stainless Steel
13. How to Check the Outside Dryer Vent
The exterior termination is easy to overlook because it is outside the laundry room. However, it is the final point where exhaust leaves the home.
During normal operation, the exterior vent should allow dryer exhaust to escape. Whirlpool recommends checking the outside exhaust hood and removing restrictions such as debris or animal nests.
Check the exterior for:
- A vent flap that does not open.
- Lint around the opening.
- Leaves or debris.
- Bird or animal nesting material.
- Landscaping blocking the opening.
- Snow or other seasonal obstruction where applicable.
- Damaged vent covers.
- Corrosion or loose components.
- A termination that appears blocked.
- Moisture collecting where it should not.
Do not cover the termination with an improvised screen or material that restricts airflow. The applicable code and manufacturer instructions should determine the correct termination design. The 2024 IRC specifically states that dryer duct terminations should have a backdraft damper and that screens should not be installed at the termination.
14. Dryer Vent Installation Near Me: When to Hire a Professional
The keyword laundry dryer vent installation near me often reflects a homeowner who needs more than a simple hose connection. If the existing wall connection is already installed and accessible, connecting a dryer may be relatively straightforward. Whirlpool describes connecting a dryer to existing venting as a manageable installation in suitable circumstances, while noting that installing entirely new ductwork may require professional help.

Professional installation is worth considering when:
- A new exterior opening must be created.
- The duct must pass through multiple walls.
- The duct runs through a ceiling or enclosed cavity.
- Structural framing may be affected.
- The route is unusually long.
- Several elbows are unavoidable.
- The existing duct is inaccessible.
- The vent terminates in an unsuitable location.
- The dryer is in a difficult interior location.
- The installation involves a gas appliance and related work.
- Local permitting or inspection requirements apply.
- You are unsure whether the existing duct complies with code.
- The vent has persistent airflow problems.
- You cannot safely inspect the entire route.
For searches such as laundry dryer vent installation Charlotte NC, use the same principle: verify that the installer understands the applicable local requirements and can explain the proposed duct route, termination, materials, and maintenance plan. Do not choose a contractor solely because they advertise dryer vent installation.
15. Laundry Dryer Vent Installation in Charlotte NC and Other Local Areas
Local installation requirements can vary, so a national article should not assume that one code or installation practice applies identically everywhere. The International Residential Code is widely used as a model code, but local jurisdictions can adopt, amend, or enforce codes differently.
If you are searching for laundry dryer vent installation Charlotte NC, dryer vent installation near me, or a similar local service, check:
- Current local building requirements.
- Whether a permit is required.
- Whether inspections apply.
- Contractor licensing requirements where applicable.
- Manufacturer instructions for your dryer.
- Whether the proposed termination complies with local requirements.
- Whether the installer will clean or inspect the existing duct.
- Whether the quoted service includes new ductwork or only appliance connection.
- Whether concealed ductwork requires additional work.
- Whether the installer documents the completed route.
This is particularly important for a new construction or remodeling project where the dryer exhaust will be concealed inside walls or ceilings.
16. Common Dryer Vent Installation Mistakes
Many vent problems originate from small installation shortcuts. A duct can look acceptable from the front of the appliance while being severely kinked or crushed behind it. Similarly, a clean lint filter does not guarantee that the entire exhaust path is clear.
Avoid these common mistakes:
- Using plastic exhaust ducting.
- Using thin foil accordion duct where it is not appropriate.
- Crushing the hose behind the dryer.
- Making the transition duct unnecessarily long.
- Creating large loops of excess duct.
- Using too many elbows.
- Ignoring manufacturer length restrictions.
- Installing the wrong diameter.
- Using protruding screws inside the duct.
- Failing to secure joints.
- Venting into an attic.
- Venting into a crawl space.
- Venting into a laundry room.
- Blocking the exterior termination.
- Ignoring unusually long drying times.
- Installing a concealed transition duct where prohibited.
- Assuming every dryer follows exactly the same installation specifications.
- Forgetting to inspect the outside termination.
- Leaving lint around the dryer.
- Moving the dryer backward without checking the transition duct.
The CPSC specifically recommends replacing plastic or foil accordion-type ducting with rigid or corrugated semi-rigid metal ducting and emphasizes maintaining proper airflow through the exhaust system.
17. Dryer Vent Maintenance After Installation
Installation is only the beginning. A dryer vent system needs periodic inspection and cleaning because lint and debris can accumulate over time. How frequently the entire vent should be cleaned depends on the installation, dryer usage, duct length, pets, laundry volume, and changes in drying performance.

CPSC recommends cleaning the lint screen before or after every load and cleaning the dryer vent and exhaust duct periodically. Its consumer guidance also recommends cleaning lint from the vent pipe at least annually.
A basic maintenance routine includes:
- Clean the lint screen every load.
- Check the lint screen for residue buildup.
- Inspect the transition duct periodically.
- Make sure the hose is not crushed.
- Check the exterior vent.
- Remove visible exterior debris.
- Watch for longer drying times.
- Check for excessive humidity around the dryer.
- Inspect accessible duct connections.
- Clean the full exhaust route as appropriate.
- Have difficult or concealed systems professionally inspected.
- Keep the space behind the dryer free of lint.
- Follow the dryer manufacturer’s maintenance schedule.
- Replace damaged duct components.
- Recheck the system after moving the appliance.
18. How to Improve Dryer Vent Airflow
Good airflow starts with a correctly designed system. Simply installing a new hose will not solve a problem if the main duct is blocked, excessively long, badly routed, or incorrectly terminated.
Whirlpool recommends a short vent with minimal bends and warns that crushed or restricted venting can reduce airflow and increase drying times.
To support better airflow:
- Use the correct duct diameter.
- Keep the transition duct short.
- Avoid unnecessary bends.
- Prevent crushing behind the dryer.
- Use suitable metal ducting.
- Keep the exterior termination clear.
- Maintain proper joints.
- Follow the manufacturer’s maximum duct length.
- Clean the entire exhaust pathway periodically.
- Check the exterior airflow during operation.
- Investigate sudden changes in drying performance.
- Avoid improvised duct reducers.
- Do not block the exhaust termination.
- Keep concealed ductwork protected from damage.
- Have complicated systems evaluated by a qualified professional.
19. A Simple Dryer Vent Installation Checklist
Before considering a laundry dryer vent installation complete, review the entire system instead of checking only the connection at the back of the dryer.
Installation checklist
- Dryer model and installation manual reviewed
- Correct duct diameter confirmed
- Suitable metal duct material selected
- Transition duct is appropriate for the application
- Main duct route planned
- Unnecessary bends eliminated
- Maximum permitted duct length checked
- Elbows accounted for
- Duct joints properly secured
- No protruding screws inside the duct
- Duct not crushed or kinked
- Concealed ductwork complies with applicable requirements
- Exterior termination is installed correctly
- Exterior vent is unobstructed
- Dryer is positioned without crushing the transition duct
- Airflow checked during operation
- No unusual heat or humidity detected
- Lint screen is clean
- Maintenance schedule established
- Professional inspection arranged if the route is complex
Conclusion
A successful laundry dryer vent installation is more than attaching a hose to the back of a dryer. The entire exhaust pathway matters, from the transition duct and permanent ductwork to the elbows, supports, exterior termination, and ongoing maintenance. Manufacturer instructions should guide the specific dryer installation, while applicable building codes establish additional requirements for duct construction, length, support, termination, and concealed installations. Whirlpool recommends suitable metal venting, short and supported connections, and minimal unnecessary bends, while the CPSC emphasizes keeping lint and exhaust pathways clean to reduce dryer-fire hazards.
For a simple connection to an existing, accessible vent, installation may be relatively straightforward when performed according to the manufacturer’s instructions. A new or complicated laundry dryer vent duct installation, however, can involve walls, ceilings, structural components, long duct runs, exterior penetrations, or local code requirements. In those situations, professional installation can help ensure that the exhaust route is properly designed and safely terminated. After installation, regular lint-screen cleaning, vent inspection, and attention to changes in drying performance help keep the system working as intended.
1. What is the best material for laundry dryer vent installation?
Rigid or appropriate semi-rigid metal venting is generally preferred for dryer exhaust systems. Whirlpool recommends heavy metal exhaust venting and warns against plastic or foil materials that can collapse or become crushed. The applicable dryer manual and local requirements should determine the exact materials for your installation.
2. How long can a dryer vent be?
There is no single length that applies to every dryer. The manufacturer’s installation instructions should be checked first. The 2024 IRC provides a specified 35-foot maximum under one of its calculation methods, with reductions for fittings, but it also provides for manufacturer-specific length calculations.
3. Can a dryer vent be installed through a wall or ceiling?
A dryer exhaust duct can be routed through building construction when the installation is designed and installed according to the applicable requirements. Concealed ductwork requires careful planning because the duct must remain properly sized, supported, protected, and free from deformation. A complex concealed route is often better handled by a qualified professional.
4. How often should a dryer vent be cleaned?
The required frequency depends on the dryer, installation, usage, and conditions. CPSC recommends cleaning the dryer vent and exhaust duct periodically and specifically advises cleaning the vent pipe at least once a year. A noticeable increase in drying time can also indicate that the exhaust path needs attention.
5. Can I install a dryer vent myself?
Connecting a dryer to an existing, accessible vent may be manageable for someone who can safely follow the manufacturer’s instructions. Installing an entirely new duct route is more complicated, especially when it involves walls, ceilings, exterior openings, long runs, gas appliances, or local permitting requirements. When the installation is uncertain or difficult to inspect, professional help is the safer approach.