
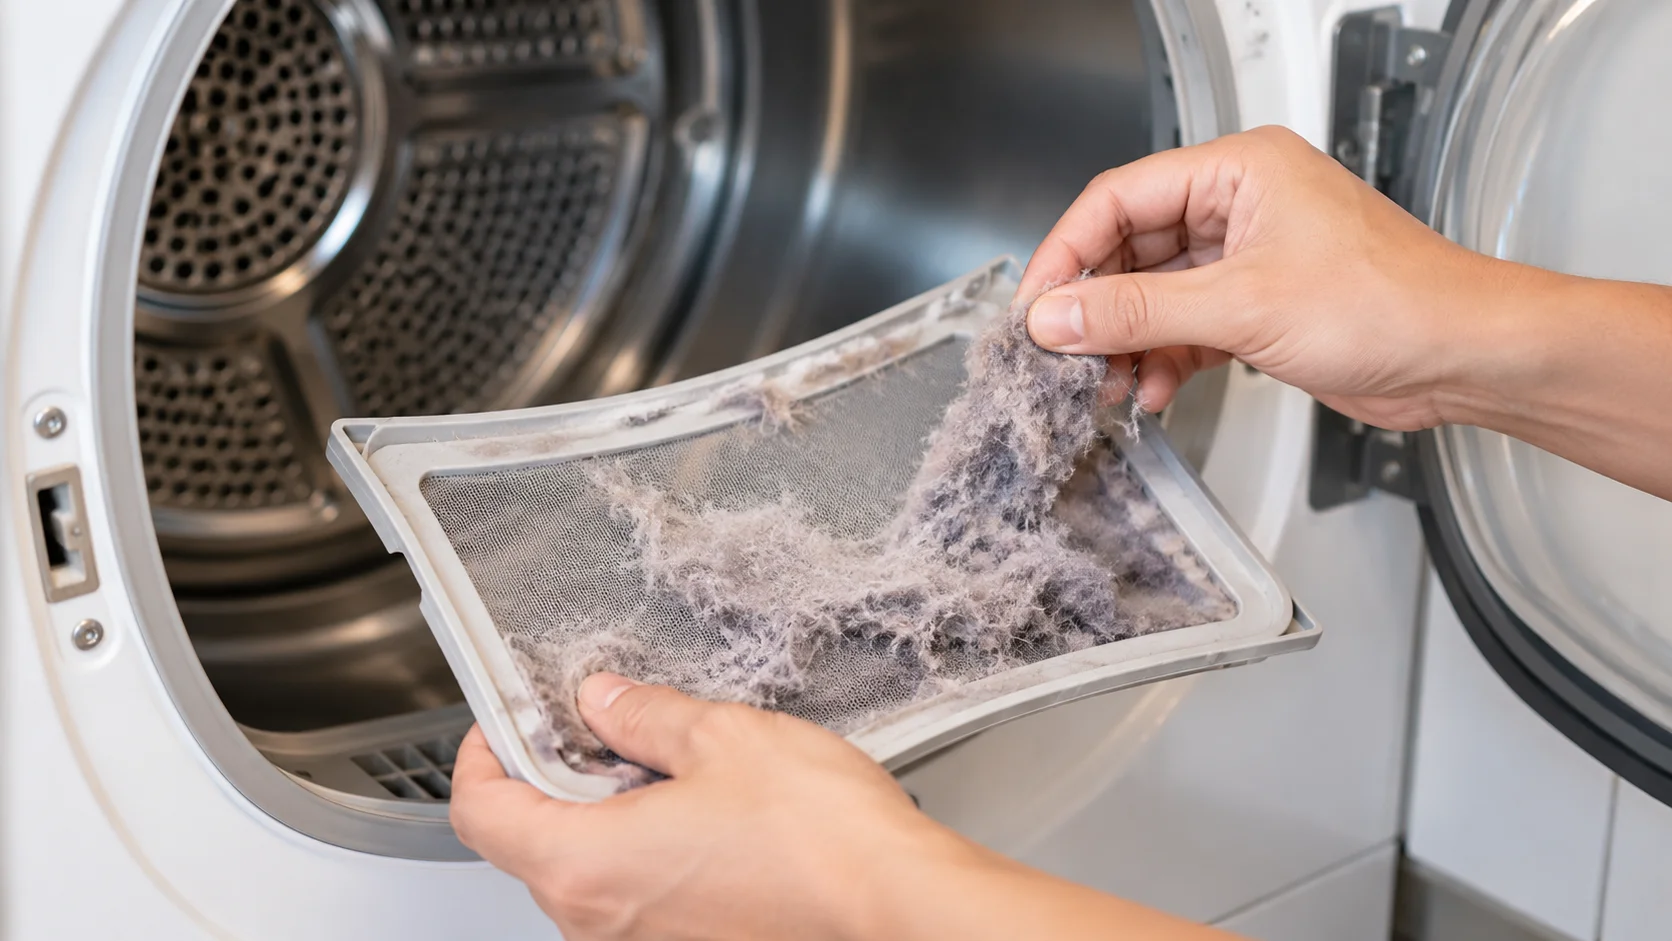
Learning how to clean a dryer properly involves more than removing the visible lint from the screen. A clothes dryer can collect lint, dust, fabric-softener residue, dryer-sheet film, hair, crayons, ink and other debris in the lint trap, drum, internal vent and exhaust duct. Regular cleaning can help maintain airflow and drying performance, while keeping the lint screen and exhaust system clear is also an important dryer-fire prevention measure. The recommends cleaning the lint screen before or after every load and periodically cleaning the dryer vent and exhaust duct.
The safest cleaning method depends on which part of the dryer you are working on. Cleaning a clothes dryer drum is different from cleaning a dryer vent, and cleaning a hair dryer filter or Revlon dryer brush is different again. This guide covers the complete process, including how to clean the inside of a dryer, lint trap, dryer drum, vent duct, roof vent, long vent, and clogged exhaust system, along with practical methods for ink, gum, odors and residue. Always give your particular dryer’s owner’s manual priority over a generic cleaning method.
How to Clean a Dryer Safely
Before deep cleaning a dryer, disconnect it from its power source. This is especially important when you are moving the appliance, disconnecting the exhaust duct, vacuuming around openings or removing components. If you have a gas dryer, follow the manufacturer’s instructions for shutting off the gas supply before disconnecting the appliance or vent.
Whirlpool recommends unplugging the dryer before cleaning and gives additional precautions for gas models.
Use this basic safety checklist:
- Turn the dryer off.
- Unplug an electric dryer before cleaning.
- Follow the manufacturer’s gas-shutoff instructions for a gas dryer.
- Allow the drum and internal components to cool.
- Do not spray cleaner directly into electrical components.
- Do not use flammable cleaning products inside a dryer.
- Do not operate a dryer without its required lint filter.
- Never leave a disconnected exhaust duct unattached when operating the dryer.
- Keep the area behind the dryer free of accumulated lint.
- Do not attempt electrical or gas repairs unless qualified to do so.
If you see smoke, smell gas, or notice an electrical-burning odor, stop using the appliance rather than trying to clean the problem away. Samsung advises shutting down a smoking electric dryer and seeking service, while a gas smell requires leaving the building and contacting emergency services.
What Parts of a Dryer Need Cleaning?
A complete dryer cleaning should address the areas where lint, residue and debris commonly accumulate. Some areas need attention after every load, while others only need periodic deep cleaning.
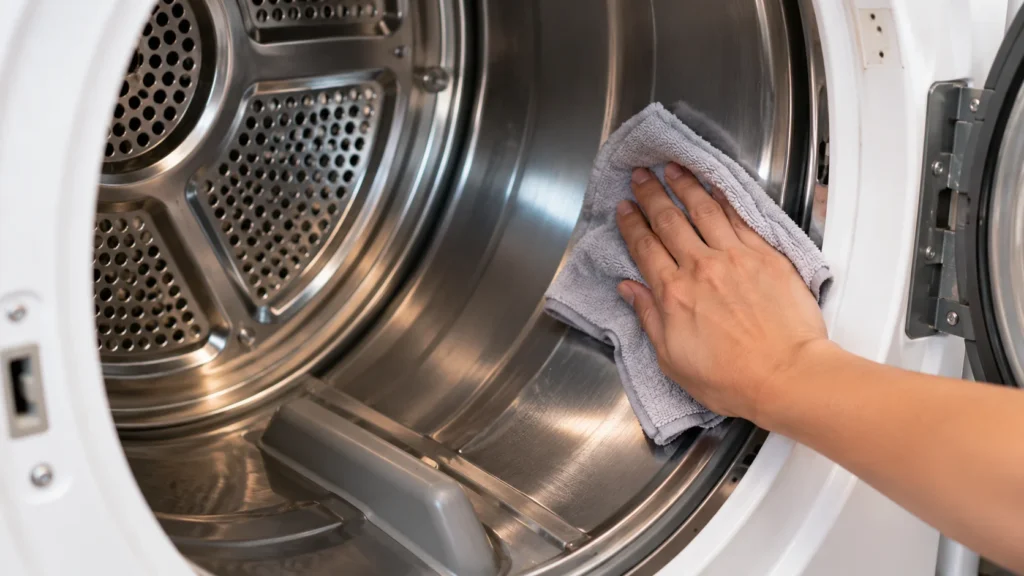
The main areas are:
- Lint screen: Remove lint after every load.
- Lint-screen housing: Vacuum accumulated lint around the opening.
- Moisture sensor bars: Clean when residue affects sensor-dry performance.
- Dryer drum: Wipe when it becomes dirty, stained or smelly.
- Internal vent: Remove accessible lint and debris.
- Exhaust duct: Inspect and clean periodically.
- Exterior vent hood: Remove lint and debris around the outlet.
- Dryer exterior: Wipe away dust, detergent and fabric-softener residue.
- Area behind the dryer: Vacuum accumulated lint and dust.
- Door and seals: Wipe away debris that could interfere with closing or airflow.
Whirlpool’s cleaning guide specifically separates lint-trap, drum, vent, exterior and maintenance tasks, while Samsung recommends cleaning the lint filter after every load and the exhaust vent once or twice a year.
How to Clean a Dryer Lint Trap
The lint trap is the first place to start when cleaning a clothes dryer. Removing lint after every load helps keep the screen from becoming blocked and supports proper airflow. Do not wait for the lint screen to look completely full before cleaning it.
Daily lint-trap cleaning
- Turn off the dryer.
- Open the door.
- Remove the lint screen.
- Roll or brush loose lint from the screen.
- Inspect the screen for buildup.
- Clean the edges and surrounding area.
- Put the screen back securely.
- Never run the dryer without the lint screen installed.
Samsung recommends cleaning the lint filter before or after every load and warns against operating the dryer with a damaged or missing filter.
Deep cleaning a dryer lint screen
Lint screens can also collect residue from dryer sheets, fabric softeners and other laundry products. If the screen appears clean but drying times are getting longer, a deeper cleaning may be appropriate.
For a deeper clean:
- Remove loose lint by hand.
- Wash the screen according to the dryer’s instructions.
- Use hot water and a suitable detergent when the manufacturer permits it.
- Gently scrub with a nylon brush.
- Rinse thoroughly.
- Remove remaining residue.
- Allow the screen to dry completely.
- Reinstall it before using the dryer.
recommends a deeper lint-screen cleaning approximately every six months or as needed and notes that residue buildup can affect drying performance.
How to Clean the Lint Trap Housing
Cleaning the removable lint screen is only part of the job. Lint can also collect inside the opening where the screen sits.
To clean the housing:
- Remove the lint screen.
- Shine a flashlight into the opening.
- Remove visible lint by hand if it is safely reachable.
- Use a narrow vacuum attachment to collect loose debris.
- A suitable dryer-cleaning brush can help reach deeper areas.
- Do not force tools into areas you cannot see.
- Avoid damaging sensors or internal components.
- Reinstall the lint screen after cleaning.
Whirlpool recommends vacuuming the interior and exterior of the lint-trap area and cleaning around moisture-sensor strips.
How to Clean the Inside of a Dryer
Cleaning the inside of a dryer means cleaning the drum, lint areas and accessible internal venting—not opening the entire appliance cabinet. You normally do not need to disassemble the dryer’s internal electrical or heating components.
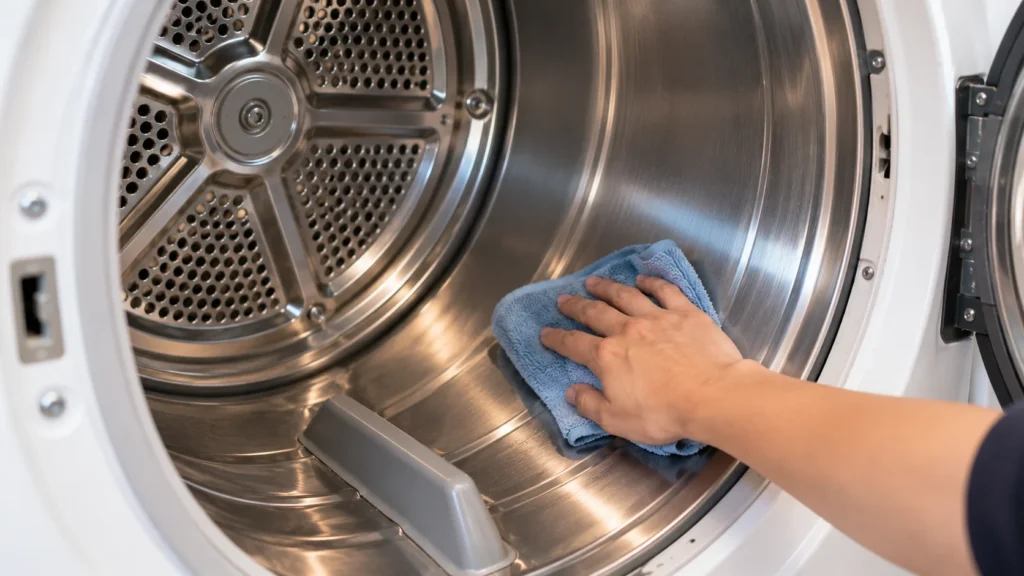
For routine interior cleaning:
- Remove all clothing.
- Remove loose lint.
- Vacuum accessible debris.
- Wipe the drum with a soft cloth.
- Use a mild, non-flammable cleaning solution when appropriate.
- Remove all cleaner residue.
- Wipe with a clean damp cloth.
- Dry the drum completely.
- Clean the lint-screen housing.
- Check for unusual stains or objects.
Whirlpool recommends a soft cloth with warm water and dish soap for the inside of an electric dryer drum and a liquid, nonflammable household cleaner for a gas dryer, followed by wiping away cleaner residue.
How to Clean a Dryer Drum
The dryer drum can collect residue from dryer sheets, fabric softeners, spilled products, ink, crayons and other objects left in pockets. Cleaning it is especially important when a substance could transfer onto clean clothing.
Basic dryer drum cleaning
- Empty the drum completely.
- Vacuum loose lint and debris.
- Mix a small amount of suitable mild detergent with warm water when permitted.
- Dampen a microfiber cloth or sponge.
- Wipe the drum thoroughly.
- Pay special attention to visible stains.
- Wipe away remaining cleaner with a clean damp cloth.
- Dry the drum.
- Leave the door open briefly to allow moisture to dissipate.
- Run an empty cycle if recommended after cleaning.
recommends cleaning the drum as needed when there is visible residue or an odor and describes using a mild hand dish detergent or nonflammable cleaner with hot water.
How to Clean the Inside of a Dryer Drum When It Smells
A smelly dryer does not always mean the drum itself is dirty. Odors can originate from lint, the exhaust system, clothing that was left damp too long, or even the washing machine.
If the drum smells:
- Remove all laundry.
- Clean the lint screen.
- Vacuum the lint-screen area.
- Wipe the drum.
- Inspect for spilled products.
- Check for crayon, ink or melted residue.
- Inspect the exhaust path for lint.
- Check the outside vent.
- Leave the door open after cleaning.
- Investigate persistent burning or electrical odors instead of masking them with fragrance.
Samsung notes that dryer odors can originate from the lint trap, exhaust vent, laundry or washing machine, and recommends addressing the actual source rather than assuming the drum is responsible.
How to Clean a Dryer That Smells
Different smells can point to different problems.
Burning smell: Stop using the dryer if the odor persists after routine cleaning. Check for lint buildup, damaged components or a problem requiring service.
Mildew or sour smell: The laundry itself may be responsible, particularly if wet clothing sat too long before drying.
Chemical smell: Check whether recently washed clothing contains residue or whether a cleaning product was used incorrectly.
Animal or unusual odor: An animal may potentially enter an exterior exhaust opening, so inspect the vent safely.
Samsung specifically notes that a burning smell can be associated with lint or vent issues, while persistent burning or electrical odors require the dryer to be shut down and serviced.
How to Clean Ink Out of a Dryer
Ink can stain the dryer drum when a pen is accidentally left in a pocket. The sooner you clean the drum, the less likely the residue is to transfer to clothing.
specifically identifies ink and crayon as examples of substances that can stain the dryer drum.
For an ink stain:
- Turn off and unplug the dryer.
- Let the drum cool.
- Remove loose debris.
- Follow the dryer’s manual for an appropriate nonflammable cleaner.
- Apply the cleaner to a cloth rather than flooding the drum.
- Gently wipe the ink-marked area.
- Repeat as necessary.
- Wipe the area with a clean damp cloth.
- Dry the drum completely.
- Inspect carefully before drying clothing.
Avoid experimenting with highly flammable solvents inside a dryer. A cleaner that works on household surfaces may not be appropriate for an appliance exposed to heat.
How to Clean Gum Out of a Dryer
Gum can stick to the drum after accidentally going through a wash-and-dry cycle. The safest approach is to remove the bulk of the material without scratching the drum.
Try this approach:
- Unplug the dryer.
- Allow the drum to cool.
- Harden or loosen the gum according to the dryer’s care instructions.
- Gently remove accessible pieces.
- Do not use a sharp metal scraper.
- Clean remaining residue with an approved mild cleaner.
- Wipe the drum with a clean damp cloth.
- Dry the drum thoroughly.
- Inspect for remaining sticky areas.
- Test the dryer with an old towel before drying important clothing.
If the gum is extensively melted or has reached areas beyond the drum, professional service may be safer than attempting to disassemble the appliance.
How to Clean a Dryer With Vinegar
Vinegar appears frequently in DIY dryer-cleaning advice, but it should be used carefully. Whirlpool recommends a water-and-vinegar solution for wiping the outside of the dryer, while its interior instructions differ between electric and gas dryers.
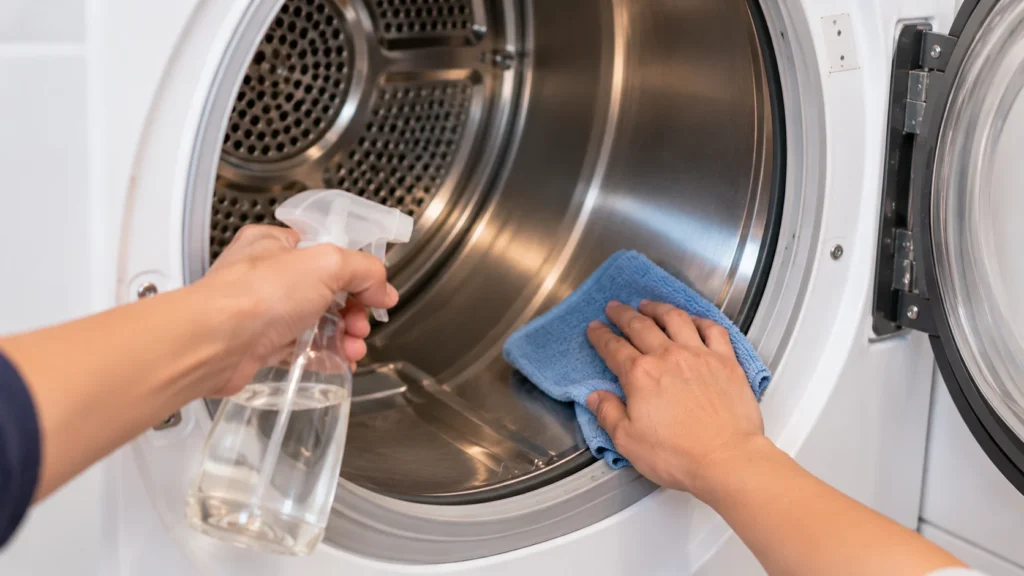
For the exterior, Whirlpool describes using equal parts water and vinegar with a microfiber cloth for stuck-on residue.
For the inside:
- Check your owner’s manual first.
- Do not spray vinegar into electrical components.
- Do not pour vinegar into the dryer.
- Do not use vinegar as a substitute for vent cleaning.
- Do not assume vinegar removes combustible lint.
- Use an appropriate nonflammable cleaner for the drum when required.
- Wipe away all cleaning residue.
- Dry the drum before use.
The key distinction is that vinegar may be suitable for a particular surface-cleaning application, but it does not replace mechanical lint removal from the dryer vent.
How to Clean a Dryer Vent
Cleaning the dryer vent is one of the most important parts of dryer maintenance. A blocked exhaust path can restrict airflow, extend drying times and contribute to overheating.
The recommends periodically cleaning the dryer vent and exhaust duct. It also advises checking the outside vent while the dryer is operating to confirm that exhaust air is escaping.
Basic dryer-vent cleaning steps
- Turn off the dryer.
- Unplug it.
- If it is a gas dryer, follow the manufacturer’s gas-shutoff procedure.
- Carefully move the dryer away from the wall.
- Disconnect the exhaust duct.
- Remove visible lint.
- Use an appropriate dryer-vent brush or vacuum.
- Clean as much of the accessible duct as possible.
- Inspect the duct for crushing, kinks or damage.
- Clean the exterior vent opening.
- Reconnect the duct securely.
- Return the dryer to its normal position.
- Run an empty cycle if recommended.
- Confirm that exhaust is flowing properly outside.
Whirlpool describes moving the dryer away from the wall, disconnecting the duct, removing lint with a brush and vacuum, cleaning the exterior vent, reconnecting the duct and running an empty cycle.
How to Clean Out a Dryer Vent Yourself
DIY dryer-vent cleaning can be possible when the duct is accessible and the homeowner has the appropriate equipment. However, a long, complicated, damaged or roof-routed vent may be better handled by a professional.
For a straightforward accessible vent:
- Unplug the dryer.
- Move it carefully.
- Disconnect the exhaust duct.
- Remove loose lint.
- Insert an appropriate vent-cleaning brush.
- Work gradually through the duct.
- Vacuum loosened debris.
- Inspect the duct.
- Clean the exterior vent opening.
- Reconnect everything securely.
Samsung provides a DIY procedure using a vent-cleaning kit, brush, extension rods, drill and vacuum, but it also recommends professional vent cleaning.
How to Clean a Dryer Vent With a Drill
A drill can be used with a purpose-built dryer-vent cleaning kit that has compatible brush heads and extension rods. It should not be treated as permission to improvise with a random drill attachment.
Samsung’s instructions specifically describe attaching a vent-cleaning brush to a drill and rotating it slowly clockwise so that the attachments remain connected.
If using a drill-based kit:
- Use a kit designed for dryer vents.
- Follow the kit manufacturer’s instructions.
- Keep the drill at the recommended speed.
- Rotate in the correct direction.
- Secure extension-rod connections.
- Do not force the brush through a blocked section.
- Keep track of the entire brush assembly.
- Vacuum loosened lint.
- Inspect for duct damage.
- Reconnect the duct securely.
If the brush becomes stuck or the duct is unusually long, stop rather than pulling aggressively.
How to Clean Out a Dryer Duct
The dryer duct carries hot, moisture-laden air from the appliance to the exterior. A buildup of lint inside it can restrict airflow.
A duct-cleaning process includes:
- Disconnecting the dryer safely.
- Separating the duct from the appliance.
- Removing loose lint.
- Brushing the duct.
- Vacuuming debris.
- Checking the entire accessible route.
- Inspecting for kinks.
- Checking for crushed sections.
- Checking connections.
- Cleaning the exterior termination.
- Reassembling the system securely.
The CPSC recommends replacing plastic or foil accordion-style ducting with rigid or corrugated semi-rigid metal ducting where appropriate, noting that flexible plastic or foil can trap lint and is more vulnerable to kinking or crushing.
How to Clean a Clogged Dryer Vent
A clogged dryer vent often reveals itself through changes in dryer performance. Clothes may take much longer to dry, the dryer may become unusually hot, or a vent-blockage warning may appear on some modern models.
Common signs include:
- Longer drying times.
- Clothes remaining damp after a normal cycle.
- Excessive heat.
- Reduced airflow outside.
- A burning smell.
- Dryer error codes related to temperature or airflow.
- Visible lint around the exterior vent.
- Repeatedly short or abnormal sensor-dry cycles.
Samsung states that clogged lint screens or vent systems can trap heat and cause temperature-related errors, and its newer models may provide a vent-blockage test.
Jump into Other Related Article
- How to Remove Peanut Butter Stains | Easy Ways to Clean Clothes, Fabric & More
- How to Clean Suede Shoes | Easy Ways to Clean Suede at Home
How to Clean a Dryer Vent From Outside
The outside exhaust opening is often overlooked. Lint can accumulate around the vent hood or termination point, restricting airflow.
To clean it:
- Locate the exterior dryer vent.
- Turn off the dryer.
- Inspect the vent cover.
- Remove accessible lint by hand.
- Use a suitable dryer-vent brush.
- Vacuum loose debris.
- Check that the vent flap or damper can move freely.
- Make sure the opening is not blocked.
- Inspect for excessive lint returning from the duct.
- Reinstall the cover securely.
Whirlpool recommends opening the exterior vent cover, removing larger lint pieces, brushing inside the ductwork and vacuuming remaining debris.
How to Clean a Roof Dryer Vent
A roof dryer vent requires extra caution because the termination point may be difficult or dangerous to access. Do not climb onto a roof simply to perform routine cleaning if you are not equipped and trained to work safely at height.
For a roof-routed dryer vent:
- Inspect the system from accessible locations first.
- Check the dryer’s owner manual.
- Determine whether the duct can be cleaned from inside.
- Do not work on a steep or wet roof.
- Do not use unsafe ladders.
- Consider professional vent cleaning.
- Have damaged ductwork repaired or replaced.
- Confirm the exterior termination is unobstructed.
- Verify proper airflow after cleaning.
Whirlpool notes that an exterior dryer vent may be located on the home’s siding or roof, while Samsung recommends professional service for dryer-vent cleaning where appropriate.
How to Clean a Long Dryer Vent
Long dryer vents can be more challenging because lint may accumulate farther from the appliance and multiple bends can make conventional cleaning difficult.
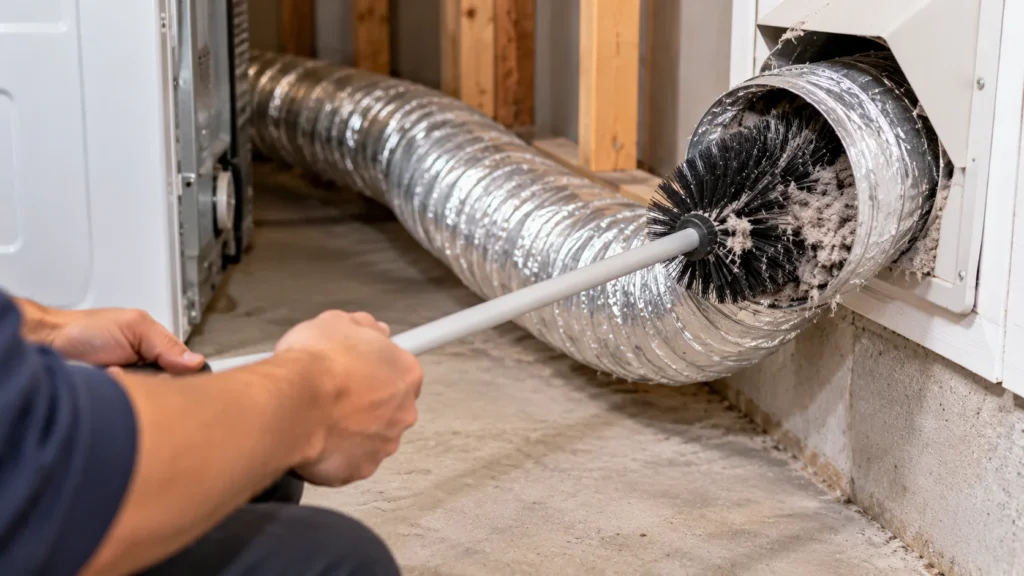
A long vent should be inspected for:
- Excessive length.
- Too many turns.
- Kinks.
- Crushed sections.
- Improper materials.
- Loose connections.
- Lint accumulation.
- Poor exterior airflow.
- Difficult-to-access sections.
Samsung notes that exhaust ducts should not exceed the maximum length specified for the model and that each additional direction change can affect allowable duct length.
If a long vent cannot be completely cleaned from accessible points, professional equipment is a better choice than forcing a brush through an unknown route.
How Long Does It Take to Clean a Dryer Vent?
There is no universal cleaning time because the duration depends on the vent’s length, accessibility, number of bends, amount of lint and whether the duct is routed through a wall, attic or roof.
A short, accessible vent may be relatively quick to clean, while a long or complicated system can take considerably longer. Samsung’s dedicated vent-blockage test itself takes approximately two minutes on compatible models, but that test is not the same thing as physically cleaning the vent.
If the vent is difficult to access or heavily blocked, do not rush the job just to finish faster.
How Often Should You Clean a Dryer Vent?
Cleaning frequency depends on the appliance, vent design, usage and manufacturer recommendations. There is no single interval that is ideal for every household.
Current manufacturer guidance varies:
- Samsung recommends cleaning the exhaust vent once or twice a year.
- recommends thorough ventilation-system cleaning at least every two years, with more frequent cleaning when needed.
- Whirlpool recommends cleaning venting at least once every two years unless the owner’s manual says otherwise, with more frequent attention if drying performance declines.
- The CPSC recommends cleaning the vent and exhaust duct periodically and checking for blockage.
Because manufacturer schedules differ, the best starting point is your specific dryer’s manual.
How Much Does It Cost to Clean a Dryer Vent?
The cost of professional dryer-vent cleaning varies considerably by location and by the difficulty of the vent system. A short, easily accessible vent is usually simpler to service than a long duct routed through walls, ceilings or a roof.
Factors that can affect the price include:
- Vent length.
- Number of bends.
- Roof or attic access.
- Degree of lint blockage.
- Accessibility behind the dryer.
- Need for specialized equipment.
- Damaged ductwork.
- Replacement of vent components.
- Local labor rates.
- Whether additional appliance service is required.
If a vent is difficult to access, heavily clogged or damaged, professional cleaning may be preferable to a risky DIY attempt.
How to Clean a Front Load Dryer
A front-load dryer does not require an entirely different cleaning philosophy, but the door area and front opening deserve attention.
Clean it by:
- Removing lint from the screen.
- Wiping the door.
- Cleaning around the opening.
- Checking the drum for residue.
- Wiping moisture-sensor bars when necessary.
- Vacuuming accessible lint.
- Inspecting the exhaust connection.
- Cleaning the vent system periodically.
- Keeping the exterior free of dust.
- Following the model-specific manual.
Samsung explains that sensor bars inside the drum can accumulate residue and may be cleaned with a soft cloth and mild soap before being dried.
How to Clean a Whirlpool Dryer
If you have a Whirlpool dryer, start with the model’s owner manual because cleaning instructions can vary by design. Whirlpool’s general dryer-cleaning guide recommends cleaning the lint trap, unplugging the dryer, wiping the drum, cleaning accessible venting, cleaning the exterior vent and running an empty cycle after the main cleaning.
A Whirlpool dryer-cleaning routine can include:
- Clean the lint screen after every load.
- Vacuum the lint-screen area.
- Unplug the appliance before deep cleaning.
- Wipe the drum.
- Remove residue from dryer sheets or fabric softener.
- Disconnect and clean the vent duct.
- Clean the exterior vent.
- Reconnect the duct.
- Run an empty cycle for approximately 10–15 minutes after the cleaning process when appropriate.
- Follow the individual model’s manual for additional maintenance.
How to Clean a Dryer
recommends cleaning the lint screen after every use and deep-cleaning it periodically. Its dryer-cleaning guidance also recommends cleaning the drum when visible residue or odors appear and cleaning the ventilation system when needed.
For a dryer:
- Remove lint after each load.
- Deep-clean the lint screen when residue accumulates.
- Vacuum around the lint trap.
- Wipe the drum as needed.
- Clean accessible internal venting.
- Inspect the external vent.
- Keep the surrounding area clean.
- Avoid overloading.
- Follow the model’s manual for specific maintenance requirements.
How to Clean a Washer and Dryer
If you are cleaning both laundry appliances at the same time, complete them separately because their maintenance requirements are different.
Dryer
- Clean lint after every load.
- Clean the drum as needed.
- Inspect the vent.
- Clean the exhaust duct periodically.
- Wipe the exterior.
- Check airflow.
Washer
- Run the manufacturer’s recommended cleaning cycle.
- Clean door seals on front-load models.
- Inspect hoses.
- Clean accessible filters.
- Remove wet laundry promptly.
- Keep the interior ventilated.
Do not use a washer-cleaning chemical inside a dryer simply because both appliances are in the same laundry room.
How to Clean a Hair Dryer Filter
A hair dryer is different from a clothes dryer. The filter or rear intake screen can collect hair and dust, restricting airflow and potentially contributing to overheating.
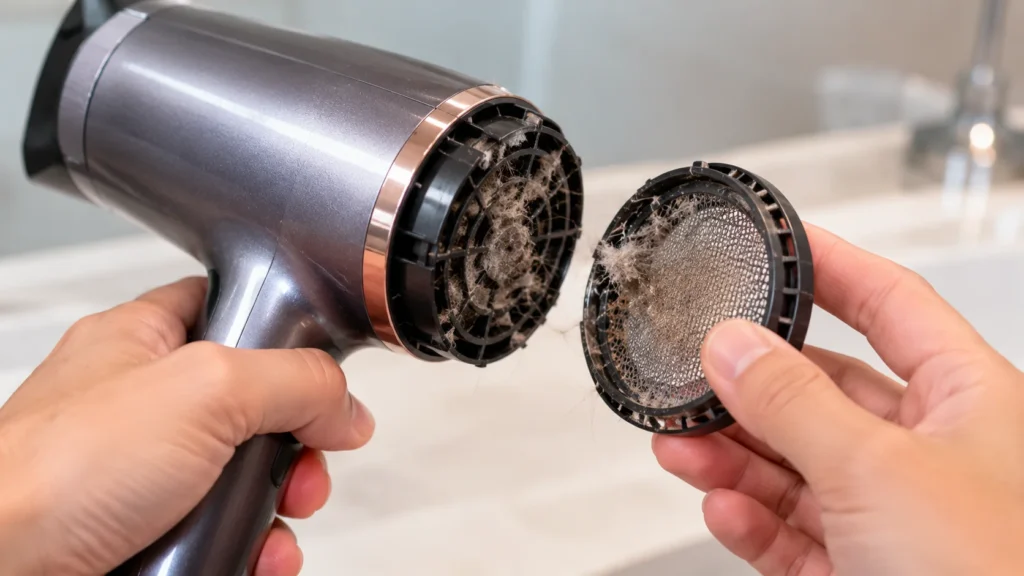
For a hair dryer:
- Unplug it first.
- Allow it to cool.
- Locate the rear filter or intake cover.
- Remove the cover if the manufacturer allows it.
- Remove visible hair and lint.
- Use a soft brush to clear dust.
- Vacuum loose debris if appropriate.
- Wash a removable filter only if the manual says it is washable.
- Let a washed filter dry completely.
- Reinstall the filter securely before use.
Never immerse an electric hair dryer in water.
How to Clean a Revlon Dryer Brush
Revlon dryer brushes and similar hot-air styling brushes can collect hair, styling-product residue and dust around their bristles and air openings. Because models differ, check the instructions for your exact Revlon device before removing a filter or cover.
A basic routine is:
- Unplug the brush.
- Let it cool completely.
- Remove trapped hair from the bristles.
- Use a small dry brush to remove dust.
- Clean accessible openings carefully.
- Avoid pushing debris into the motor.
- Do not immerse the electrical appliance.
- Do not use the device while wet.
- Make sure removable parts are completely dry.
- Reassemble everything before use.
How to Clean a Blow Dryer Brush
For a blow-dryer brush, cleaning the bristles is usually the first priority. Hair can wrap around the brush and collect near the air intake.
Use these steps:
- Disconnect the appliance.
- Allow it to cool.
- Remove tangled hair by hand.
- Cut stubborn hair carefully if necessary.
- Brush away dust.
- Clean the air-intake filter according to the manual.
- Avoid spraying liquid into motor openings.
- Wipe the housing with a slightly damp cloth if permitted.
- Dry everything completely.
- Inspect the cord and appliance before reuse.
How to Deep Clean a Dryer
A deep cleaning should combine the routine tasks rather than relying on one cleaning product. Start with lint removal, then address the drum, lint-screen housing, internal vent and exterior exhaust.
Deep-cleaning checklist
- Unplug the dryer.
- Clean the lint screen.
- Vacuum the lint-screen housing.
- Inspect moisture sensors.
- Vacuum accessible lint.
- Wipe the drum.
- Remove stains and residue.
- Clean the inside of the exhaust connection.
- Clean the duct.
- Clean the exterior vent.
- Check for damaged ducting.
- Clean the area behind the dryer.
- Wipe the exterior.
- Reconnect the duct securely.
- Run an empty cycle when recommended.
CPSC guidance emphasizes cleaning the lint screen, exhaust duct and area behind the dryer because lint accumulation can contribute to overheating and fire risk.
Can a Dirty Dryer Cause Longer Drying Times?
Yes. Restricted airflow is one possible reason a dryer takes longer to dry clothes. A clogged lint screen or exhaust system can prevent moisture and heated air from leaving the appliance efficiently.
Samsung states that a clogged lint filter or exhaust system can prevent proper airflow and lead to longer drying times, while similarly identifies poor ventilation as a reason for extended drying.
Before assuming the heating element is defective:
- Clean the lint screen.
- Inspect the lint-screen housing.
- Check the exhaust vent.
- Look for kinks or crushed ducting.
- Check exterior airflow.
- Run the model’s vent-blockage test if available.
- Contact service if the problem continues.
Dryer Cleaning Mistakes to Avoid
Some cleaning methods found online can create more problems than they solve. Dryer maintenance should prioritize lint removal, airflow, safe cleaning products and manufacturer instructions.
Avoid:
- Running the dryer without its lint filter.
- Ignoring a clogged exhaust duct.
- Leaving the vent disconnected.
- Using flammable cleaners inside the dryer.
- Spraying liquid into electrical components.
- Using excessive water inside the drum.
- Scraping the drum with sharp metal tools.
- Ignoring a persistent burning smell.
- Continuing to operate a dryer that is smoking.
- Using plastic or unsuitable flexible ducting where the manufacturer specifies metal ducting.
- Blocking the exterior exhaust opening.
- Moving a heavy dryer alone.
- Climbing onto a roof without appropriate safety equipment.
- Assuming every dryer has identical cleaning instructions.
The CPSC specifically recommends proper duct materials and periodic cleaning of the lint screen and exhaust system.
A Simple Dryer Cleaning Schedule
Keeping a schedule makes dryer maintenance easier because not every component needs to be cleaned at the same frequency.
| Dryer Part | Suggested Attention |
| Lint screen | After every load |
| Lint-screen housing | Periodically or when lint accumulates |
| Drum | When dirty, stained or smelly |
| Moisture sensor bars | When residue affects sensor performance |
| Exterior | As needed |
| Area behind dryer | Periodically |
| Exhaust vent | According to manufacturer guidance |
| Exhaust duct | Periodically and whenever airflow is restricted |
| Professional internal inspection | When significant lint accumulation or a mechanical problem is suspected |
Samsung recommends cleaning the lint filter every load and the exhaust vent once or twice per year, while Whirlpool and provide different general intervals for vent cleaning. Therefore, your owner’s manual and actual dryer performance should guide the final schedule.
Final Dryer Cleaning Checklist
Before considering your dryer clean, check each of these areas:
- Lint removed from the screen
- Lint-screen housing vacuumed
- Moisture sensors checked
- Drum wiped
- Ink, gum or residue removed
- Interior vent inspected
- Exhaust duct cleaned
- Exterior vent cleared
- Duct checked for kinks or crushing
- Dryer moved back safely
- Vent reconnected securely
- Exterior wiped
- Area behind dryer cleared
- No burning or electrical odor remains
- Dryer operates with normal airflow
- Manufacturer maintenance requirements followed
Conclusion
Knowing how to clean a dryer correctly means maintaining the entire airflow and drying system rather than simply wiping the drum. Clean the lint screen after every load, periodically deep-clean the screen and lint-trap housing, wipe the drum when residue or odors appear, and inspect the internal and external exhaust paths. Ink, gum, crayons, dryer-sheet residue and other stains can be handled with appropriate nonflammable cleaning methods, while a clogged or unusually long vent may require specialized equipment or professional service. Manufacturer guidance from Whirlpool, and Samsung consistently emphasizes lint removal and proper vent maintenance as important parts of dryer care.
Vent cleaning is also a safety issue, not just a housekeeping task. The CPSC warns that lint can build up in dryers and exhaust ducts, restricting airflow and contributing to excessive heat, and recommends periodic cleaning of the lint screen, vent and exhaust duct. If your dryer repeatedly takes too long to dry, produces a persistent burning smell, smokes, shows a vent-blockage warning or has an electrical or gas-related problem, stop using it and address the underlying issue instead of repeatedly cleaning the visible drum.
1. How often should you clean a dryer lint trap?
2. How often should you clean a dryer vent?
The appropriate interval depends on your dryer, vent design and manufacturer’s instructions. Samsung recommends cleaning the exhaust vent once or twice a year, while and Whirlpool give broader guidance around periodic or at-least-every-two-year cleaning. Clean it sooner if drying times become longer or airflow is restricted.
3. How do you clean the inside of a dryer drum?
Unplug the dryer, remove loose lint and wipe the drum with a soft cloth and an appropriate mild, nonflammable cleaning solution. Remove all cleaning residue with a clean damp cloth and dry the drum before using it. specifically recommends cleaning the drum when visible residue, ink, crayon marks or odors appear.
4. Can you clean a dryer vent yourself?
Yes, an accessible dryer vent can sometimes be cleaned with a suitable dryer-vent brush, vacuum or manufacturer-approved cleaning kit. However, long, complicated, roof-routed or damaged ducts can be difficult and potentially unsafe to clean yourself. Samsung provides DIY instructions but also recommends professional vent cleaning.
5. What are the signs that a dryer vent needs cleaning?
Common warning signs include clothes taking longer than usual to dry, reduced airflow at the outside vent, excessive heat, a burning smell, visible lint around the exhaust opening or a vent-blockage warning on compatible dryers. A persistent burning or electrical smell should be treated as a safety problem rather than simply a cleaning issue.