
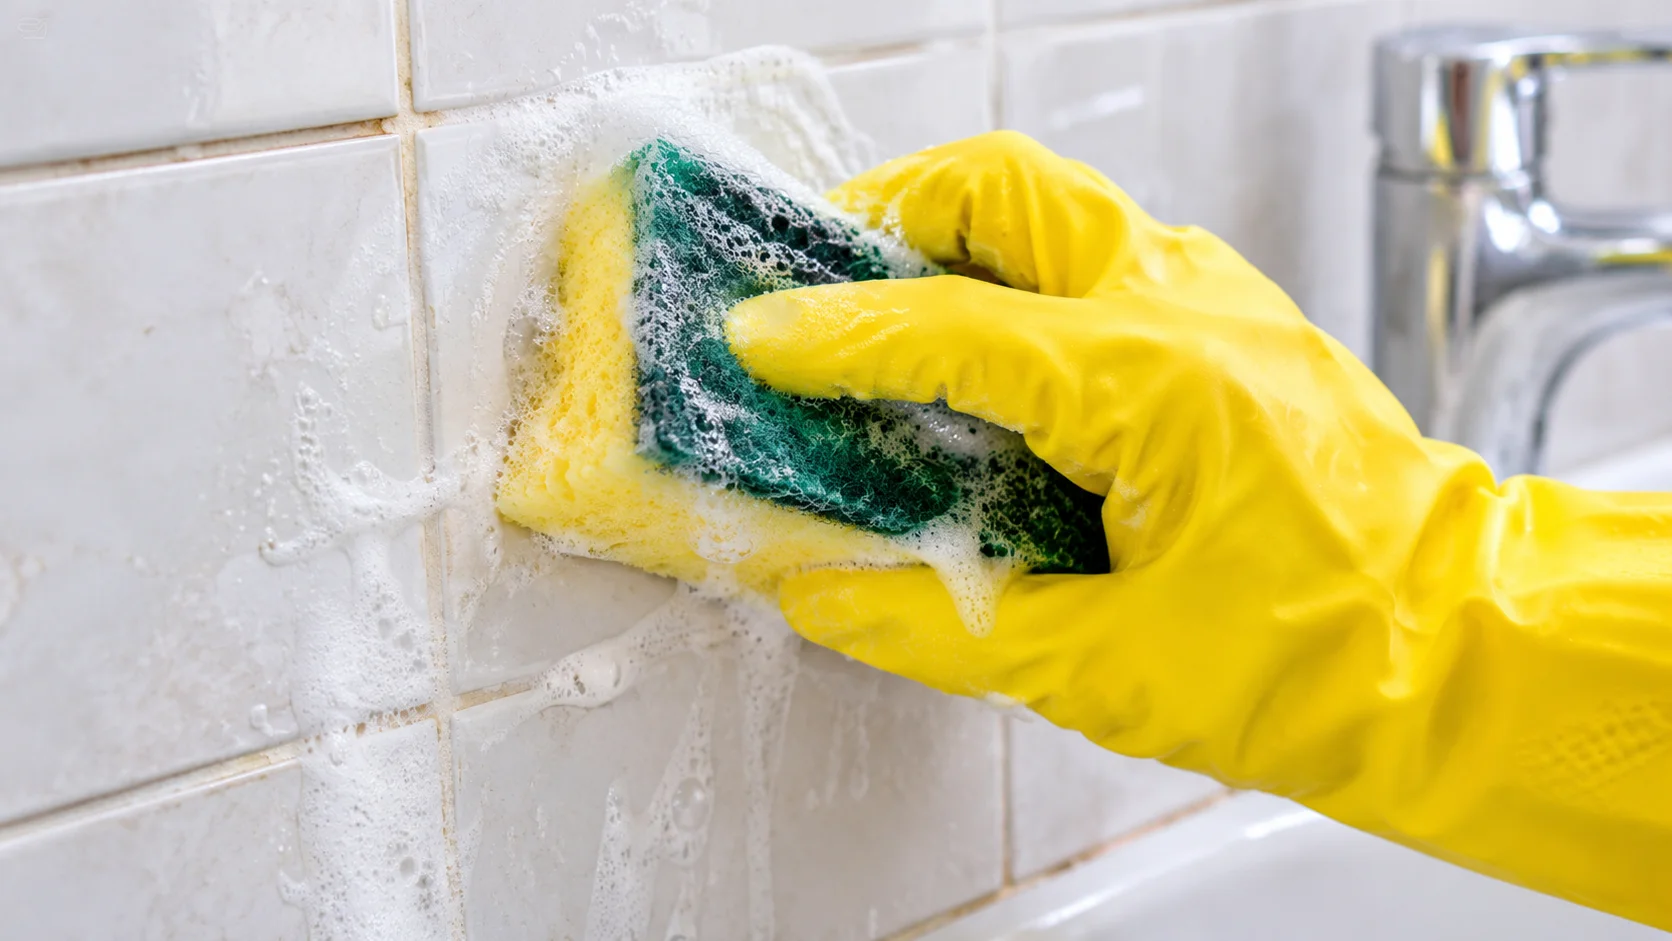
Knowing how to clean a bathroom properly helps you maintain a fresh, comfortable, and hygienic space without wasting time or using unnecessary cleaning products. From soap scum on shower tiles to toothpaste around the bathroom sink, dust on the exhaust fan, and stains along floor grout, each surface needs the right cleaning method. A simple routine can make everyday bathroom cleaning easier, while occasional deep cleaning helps you tackle neglected corners, stubborn buildup, and hard-to-reach areas.
The most effective approach is to work from top to bottom, remove dry dust before applying cleaning solutions, and finish with the floor. Use products suited to each surface, follow their labels, and never mix cleaning chemicals. This guide explains how to clean a bathroom step by step, how to clean bathroom tiles, sinks, mirrors, walls, floors, drains, and vents, and how to deal with mold or mildew safely. You will also find a practical bathroom cleaning checklist and a routine for keeping the room clean between deep cleans.
What You Need Before Cleaning a Bathroom
Gathering your supplies before you start prevents interruptions and helps you avoid using the wrong product on a delicate surface. You do not need a different cleaner for every part of the bathroom; a suitable multipurpose bathroom cleaner, a glass cleaner, and a few dedicated tools are usually enough for routine maintenance.
Bathroom cleaning supplies checklist
- Microfiber cloths for mirrors, faucets, shelves, and other surfaces.
- A non-scratch sponge for sinks, bathtubs, and suitable tile surfaces.
- A soft-bristled brush for grout, corners, and stubborn residue.
- A toilet brush and a separate cloth for the toilet.
- A mop and bucket or a suitable floor-cleaning tool.
- A vacuum cleaner or dusting attachment for dry debris and bathroom rugs.
- A bathroom cleaner compatible with your tile, sink, tub, and fixtures.
- A glass cleaner for mirrors and suitable glass surfaces.
- A mild detergent for washable rugs and removable accessories.
- Protective gloves, plus eye protection when the product label recommends it.
Keep separate cloths or clearly designated tools for the toilet and other bathroom surfaces. This helps prevent transferring contamination from one area to another.
Important safety note: Never mix bleach with ammonia, vinegar, toilet-bowl cleaner, or other cleaning products. Mixing household cleaners can release dangerous vapors. Read each product label, provide ventilation, and follow the required contact time and rinsing instructions.
How to Clean a Bathroom Step by Step
The easiest way to clean a bathroom is to follow the same order every time. Start with dry tasks, clean higher surfaces before lower ones, and leave the floor until the end. This prevents dust and dirty water from landing on areas you have already cleaned.
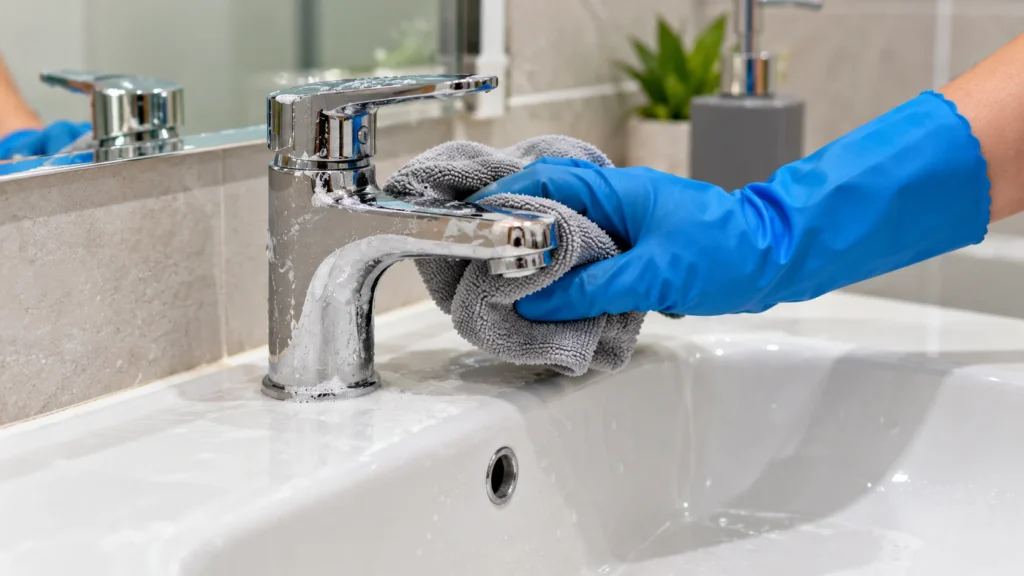
Step 1: Clear the room
Remove toiletries, bath mats, towels, trash, and movable items from the sink and floor. Put washable items in the laundry and empty the trash bin. Clearing the room exposes hidden dirt and makes it easier to reach the edges.
Step 2: Remove dust from high areas
Dust light fixtures, shelves, the top of cabinets, bathroom walls where appropriate, and the outside of the exhaust fan grille. Use a suitable duster or vacuum attachment, and do not spray liquid directly into electrical fixtures or vents.
Step 3: Apply the appropriate cleaner
Apply a surface-compatible cleaner to the sink, tub, shower, and tiles. Let it sit for the time stated on its label. Do not assume that leaving a product on longer will improve results, and never let a cleaner dry on a surface if the directions require rinsing.
Step 4: Scrub and wipe surfaces
Work on soap scum, toothpaste residue, water spots, and dirt with a soft sponge or suitable brush. Pay attention to faucet bases, corners, grout lines, and the edges around the basin.
Step 5: Clean mirrors and touch points
Wipe the mirror, handles, switches, cabinet pulls, and door handle using appropriate products. Avoid soaking electrical switches, and apply cleaner to a cloth first when needed.
Step 6: Finish with the floor
Remove hair and loose debris, then mop with a cleaner suitable for the floor material. Start at the farthest point and work toward the exit. Allow the floor to dry before replacing bath mats or walking on it.
This top-to-bottom approach is also recommended in general home deep-cleaning guidance because it reduces the chance of debris falling onto already-cleaned surfaces.
How to Clean Bathroom Tiles and Grout
Bathroom tiles collect soap residue, body oils, hard-water deposits, and everyday grime. Grout can be harder to clean because its texture traps dirt, particularly around showers, tubs, and frequently used floor areas. The best method depends on whether you have ceramic, porcelain, natural stone, or another tile material.
How to clean bathroom tiles
- Remove loose dust, hair, and debris with a dry cloth or vacuum attachment.
- Choose a tile cleaner suitable for the specific surface.
- Apply it according to the product label, especially the recommended dwell time.
- Gently scrub with a non-scratch sponge or soft brush.
- Rinse away cleaner residue if the directions require it.
- Wipe the tiles dry with a clean microfiber cloth to reduce water marks.
For routine cleaning, warm water and a compatible mild detergent may be sufficient. Avoid abrasive pads and unapproved acidic cleaners on sensitive finishes or natural stone. If you are unsure what the tile is made of, check the manufacturer’s care instructions before using a stronger product.
How to clean bathroom tile grout
- Use a grout-compatible cleaner and test it on a small, inconspicuous area first.
- Work in manageable sections so the cleaner does not dry before you finish.
- Agitate dirty grout with a soft or medium-soft grout brush.
- Use gentle pressure instead of aggressive scraping that could damage grout or surrounding sealant.
- Rinse or wipe away residue as directed by the cleaner’s label.
- Dry the area and check whether dark marks remain.
For stubborn grout stains, repeat a compatible cleaning process rather than combining several products. If grout is cracked, crumbling, or persistently discolored despite proper cleaning, the issue may require repair or regrouting instead of more scrubbing.
Avoid treating every grout line the same way. Cement-based grout, epoxy grout, and grout around natural stone may have different care requirements. Always follow the tile and grout manufacturer’s instructions.
Jump into Other Related Article
- How to Remove Peanut Butter Stains | Easy Ways to Clean Clothes, Fabric & More
- How to Clean Suede Shoes | Easy Ways to Clean Suede at Home
- How to Clean a Dryer | Lint Trap, Drum, Vent, Duct & Deep Cleaning Guide
- Dryer Sheets | What They Do, How They Work, Benefits, Risks & Best Alternatives
How to Clean a Bathroom Sink, Faucet, and Drain
A bathroom sink can develop toothpaste marks, soap residue, cosmetic stains, and mineral deposits. The faucet base and drain opening often collect grime that is easy to overlook during a quick wipe.
How to clean a bathroom sink
- Remove soap dispensers, toothbrush holders, and other items.
- Rinse away loose debris with warm water.
- Apply a sink-compatible bathroom cleaner.
- Wipe the basin with a soft sponge or cloth.
- Use a small soft brush around the faucet base, handles, and drain rim.
- Rinse the surface if required and dry with a clean cloth.
The cleaner should be suitable for the sink material, whether porcelain, ceramic, composite, or natural stone. Avoid harsh abrasives that may scratch the finish. Manufacturer guidance also emphasizes following the cleaner label and using suitable tools for the sink and faucet surface.
How to clean a bathroom faucet
- Wipe the spout, handles, and faucet base with a compatible cleaner.
- Use a soft brush or cloth to reach the narrow gap where the faucet meets the sink.
- For white mineral deposits, select a product approved for the faucet finish.
- Rinse away cleaner residue where directed and dry the fixture to reduce water spots.
- Avoid abrasive pads and strong acids unless the faucet manufacturer explicitly permits them.
Chrome, brushed nickel, brass, and specialty finishes may respond differently to cleaning chemicals. When in doubt, use the manufacturer’s recommended method rather than an improvised acidic mixture.
How to clean a bathroom sink drain
If the sink drains normally but the opening looks dirty, remove visible hair and residue from the stopper area using gloves and a suitable cleaning tool. Wipe the exposed drain rim and stopper, then rinse according to the product instructions.
If the drain is slow, try these steps:
- Remove and clean a stopper that is designed to be removed by the user.
- Pull out accessible hair and debris with a drain-cleaning tool.
- Flush with water as appropriate for the plumbing and stopper system.
- If the blockage remains, use a suitable mechanical method or contact a plumber.
Do not combine chemical drain openers with bleach, vinegar, or other cleaners. If a chemical drain product has already been used, follow its label carefully and do not introduce another chemical into the drain. Repeated clogs, leaks, or persistent sewer-like smells deserve professional assessment rather than repeated chemical treatment.
How to Clean Bathroom Walls and the Ceiling
Bathroom walls and ceilings are easy to overlook because they are not touched as often as the sink or faucet. However, steam, dust, splashes, and poor ventilation can leave them marked or damp. Before cleaning, identify the surface finish: painted drywall, washable paint, tile, and natural stone do not all tolerate the same products.
How to clean bathroom walls
- Remove dust with a dry microfiber cloth or a suitable vacuum attachment.
- Check the paint or wall-covering manufacturer’s care instructions.
- Test a mild cleaning solution in a hidden spot.
- Wipe washable surfaces gently with a damp cloth, working from top to bottom.
- Avoid soaking drywall, seams, or areas with damaged paint.
- Dry the wall and improve ventilation to help remove lingering moisture.
For tiled bathroom walls, use the tile-cleaning method described earlier. If you notice peeling paint, bubbling, soft drywall, or recurring damp patches, investigate the source of moisture before repainting or covering the damage.
How to clean mold off bathroom walls
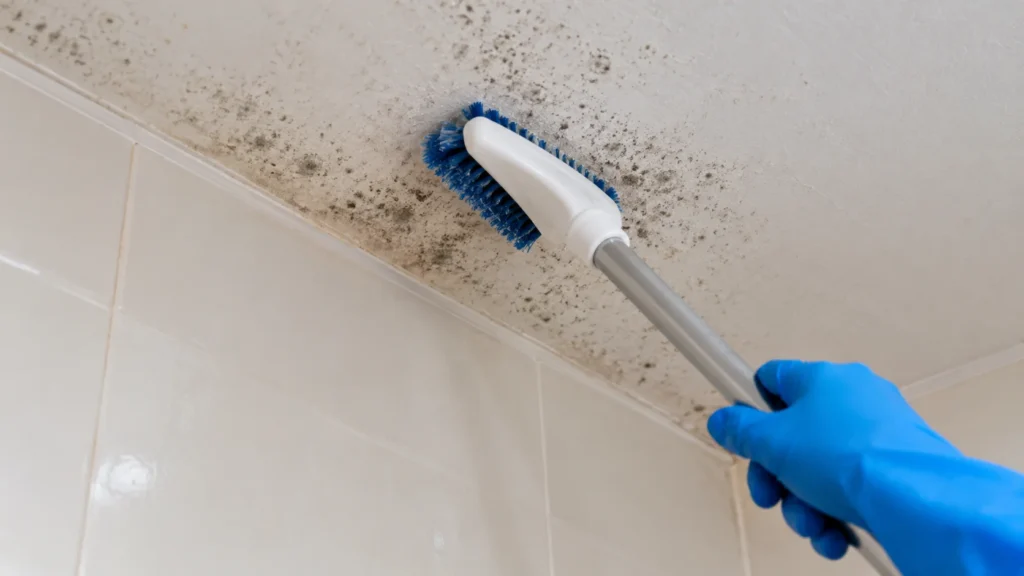
Mold may appear as dark, greenish, or discolored patches in damp areas. Small areas on washable, nonporous surfaces may be manageable with appropriate protective equipment and a suitable cleaning method, but mold on porous materials can be more difficult to remove completely.
- Improve ventilation and protect your hands and eyes.
- Use a suitable cleaner according to its label.
- Do not dry-brush mold or use a method that spreads contaminated dust.
- Never mix bleach with another cleaner.
- Dry the surface completely and address the moisture source.
- Seek professional help if mold covers a large area, returns repeatedly, or is associated with significant water damage.
The advises using protective gloves and eye protection during mold cleanup and ensuring fresh air when cleaning. The appropriate response depends on the extent of water damage and the material affected.
How to clean mold from a bathroom ceiling
Mold on a bathroom ceiling can develop when humid air repeatedly condenses on a cool surface. Start by checking whether the marks are surface growth or signs of a leak, damaged paint, or water intrusion from above.
For a small, accessible area on a suitable washable surface, follow these precautions:
- Ventilate the room and use gloves and eye protection.
- Check the ceiling material and product label before applying any cleaner.
- Clean only if the surface can be treated safely without soaking it.
- Avoid spraying liquid overhead in a way that could drip into your eyes or onto electrical fittings.
- Dry the area and use the exhaust fan to remove moisture after bathing.
Do not simply paint over mold or assume that removing the visible marks fixes the problem. If the ceiling is soft, swollen, peeling, persistently wet, or extensively moldy, arrange an assessment to find and correct the cause. The emphasizes that mold cleanup must be paired with moisture control to help prevent recurrence.
How to clean mildew off a bathroom ceiling
Mildew-like marks may respond to cleaning on an appropriate, washable surface, but discoloration can also indicate damaged paint or moisture trapped beneath the finish. Test any cleaner in a small area, follow the label, and avoid abrasive scrubbing that removes paint.
If the marks return soon after cleaning, inspect the exhaust fan, shower ventilation, and any plumbing or roof leaks. Repeated growth is a sign that the moisture problem has not been resolved.
How to Clean a Bathroom Exhaust Fan, Vent, and Fan Cover
The bathroom exhaust fan helps remove humid air and odors. A dusty grille can restrict airflow, while poor ventilation can allow moisture to linger on mirrors, ceilings, walls, and grout. Regularly cleaning the accessible fan cover is a useful part of bathroom maintenance.
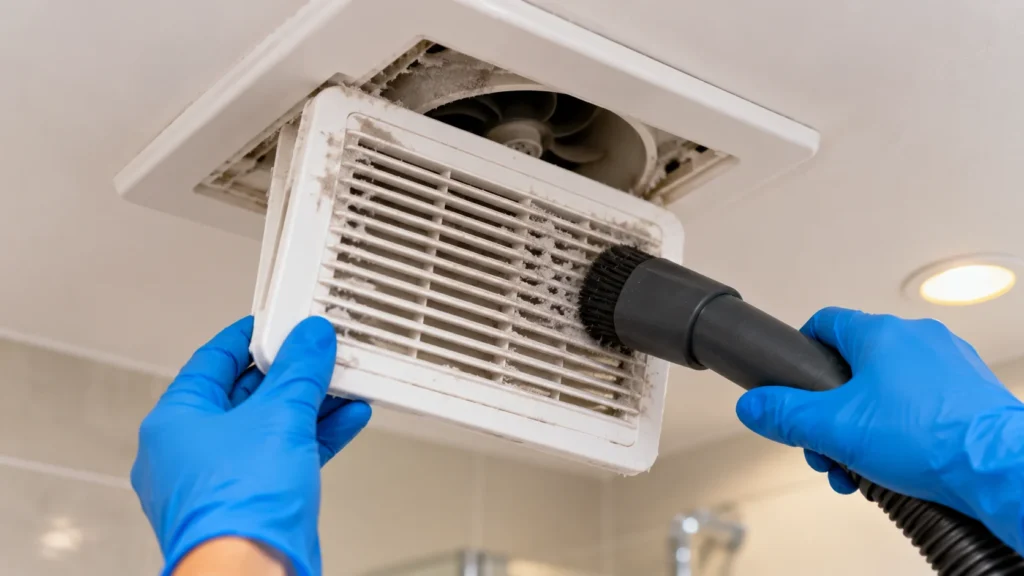
How to clean a bathroom vent fan
Safety first: Turn off the fan and disconnect power at the appropriate breaker before removing the grille or cleaning accessible internal parts. If you cannot safely identify the circuit or the fan has exposed wiring, stop and contact a qualified professional.
- Turn off power to the fan.
- Use a stable step stool if needed, and avoid stretching or leaning dangerously.
- Carefully lower the grille according to the fan manufacturer’s instructions.
- Remove loose dust with a vacuum’s soft brush or hose attachment.
- Wash a removable plastic grille in warm, soapy water if the manual allows it.
- Wipe the accessible housing carefully without soaking the motor or electrical parts.
- Allow the grille to dry completely.
- Reinstall it securely before restoring power.
Broan-NuTone’s maintenance guidance recommends switching off power, vacuuming accumulated dust from accessible housing, and washing the removable cover in warm, soapy water before reinstalling it dry.
How to clean a bathroom exhaust fan without removing it
If you do not want to remove the fan grille, you can still carry out basic external maintenance:
- Switch the fan off before cleaning.
- Use a vacuum brush attachment to remove dust from the exterior grille.
- Wipe the outside with a slightly damp cloth if the material permits.
- Keep liquids away from the motor, wiring, and electrical openings.
- Let the grille dry before turning the fan back on.
This method can remove surface dust, but it cannot clean the interior of the fan as thoroughly as the manufacturer-approved grille-removal method. If airflow remains weak, the fan is unusually noisy, or dust is heavily built up inside, consult the manual or arrange service.
How to clean a Broan bathroom fan
For a Broan or Broan-NuTone bathroom fan, begin by locating the model number and checking the instructions for that specific unit. Different models may have different grille clips, lights, heaters, or motor assemblies, so do not force a cover off.
- Turn off power before maintenance.
- Remove the grille only as instructed for the model.
- Vacuum accessible dust gently.
- Clean removable covers separately if permitted.
- Avoid wetting electrical components.
- Reinstall all parts correctly before switching the fan on.
Broan-NuTone provides model-specific information and technical videos for some fan and grille assemblies.
How to clean a NuTone bathroom fan
NuTone and Broan-NuTone models may differ by age and design. Find the model number before removing components, and follow the appropriate product instructions. If the fan includes a heater, light, or integrated electronic control, do not assume that the cleaning procedure is identical to a basic ventilation fan.
How to clean a bathroom fan vent
The word vent can refer to the visible ceiling grille, the fan housing, or the duct that carries air outdoors. Homeowners can usually clean dust from the accessible grille and permitted portions of the housing. Ductwork, roof outlets, wiring, and hard-to-reach components may require professional attention.
Never push objects deep into the duct or spray cleaner into the vent. If the fan does not seem to remove moisture, check for obvious dust buildup and consult a qualified technician if the problem continues.
How to Clean Bathroom Mold and Mildew Safely
Bathroom mold is often connected to excess moisture, condensation, plumbing leaks, or inadequate ventilation. Cleaning visible growth may improve the appearance of a surface, but it will not prevent regrowth if the underlying dampness remains.
A safe approach to bathroom mold
- Identify the source: Look for persistent condensation, leaks, failed caulk, and areas that remain wet.
- Choose the right cleaner: Check whether it is suitable for the affected surface and the type of cleaning required.
- Protect yourself: Use gloves and eye protection as appropriate, and keep the area ventilated.
- Avoid chemical mixtures: Do not combine bleach with vinegar, ammonia, toilet cleaner, or other cleaning products.
- Dry the surface: Remove excess moisture and allow the area to dry.
- Prevent recurrence: Improve ventilation and repair leaks or other moisture sources.
The states that bleach should never be mixed with other household cleaners and recommends following product instructions while providing fresh air during cleanup.
When bathroom mold needs professional attention
Consider professional help if mold is widespread, repeatedly returns, affects porous building materials, or follows flooding or substantial water damage. Get the source of the moisture investigated if the ceiling or wall is soft, paint is peeling, or a musty smell persists despite cleaning.
Do not rely on smell alone to judge whether mold is present, and do not treat a surface that appears clean as proof that a hidden leak has been resolved. The recommends addressing mold and its moisture source rather than relying on testing as the only way to decide what to do.
How to Clean a Bathroom Floor and Floor Grout
Bathroom floors collect hair, dust, footprints, soap residue, and moisture tracked out of the shower. The right method depends on whether the floor is ceramic tile, porcelain, vinyl, natural stone, or another material.
How to clean a bathroom floor
- Remove bath mats, bins, and other movable objects.
- Sweep or vacuum loose dust and hair.
- Apply a floor cleaner approved for your flooring material.
- Mop using the recommended dilution and amount of water.
- Clean around the toilet base and along the room’s edges.
- Rinse if the product instructions require it.
- Let the floor dry before replacing mats and other items.
Use as little water as the floor material allows. Excess moisture can seep into damaged seams, affect some flooring materials, or leave the floor slippery. Avoid using a product that leaves a heavy residue, especially on a floor that is already prone to slipping.
How to clean bathroom floor grout
Floor grout often becomes darker than wall grout because it collects dirt from foot traffic. To clean it, apply a grout-compatible product, allow the specified contact time, and gently scrub with a grout brush. Work in small sections, then remove residue as directed.
If the grout remains stained after cleaning, consider whether the discoloration is embedded, whether the grout needs resealing, or whether repairs are required. Do not automatically use a strong acidic cleaner or bleach on every grout type.
How to clean bathroom floor tiles
For ceramic and porcelain tiles, a suitable tile or floor cleaner and a soft mop are generally practical choices. Focus on the corners, the area around the toilet, and the floor near the shower where residue can accumulate.
For natural stone, check the stone supplier’s maintenance guidance before using an ordinary bathroom cleaner. Some stone surfaces can be damaged by acidic or otherwise unsuitable products. Never assume that a cleaner labelled for ceramic tile is safe for every floor.
How to Clean a Bathroom Mirror and Remove Water Spots
Bathroom mirrors can develop toothpaste splashes, fingerprints, dried droplets, and streaks from unsuitable cleaners. They are usually quick to clean when you use a clean microfiber cloth and a glass cleaner suitable for the mirror.
- Remove dust with a dry microfiber cloth.
- Apply a small amount of glass cleaner to the cloth or follow the product directions.
- Wipe the mirror in overlapping strokes.
- Pay attention to toothpaste marks and the lower corners.
- Buff with a dry, clean cloth to remove remaining streaks.
Avoid flooding the mirror’s edges with liquid, particularly if the mirror has a backing that may be damaged by moisture. If white marks remain, they may be on the glass, the mirror coating, or the surrounding surface. Do not use an abrasive pad to scrape them away.
To reduce future water spots, wipe splashes from nearby surfaces and improve ventilation so condensation does not linger.
How to Clean Bathroom Rugs, Bath Mats, and Accessories
Bathroom rugs and bath mats absorb water and collect hair, dust, and everyday dirt. Cleaning frequency depends on how many people use the bathroom, how quickly the mat dries, and whether it becomes visibly dirty or develops an odor.
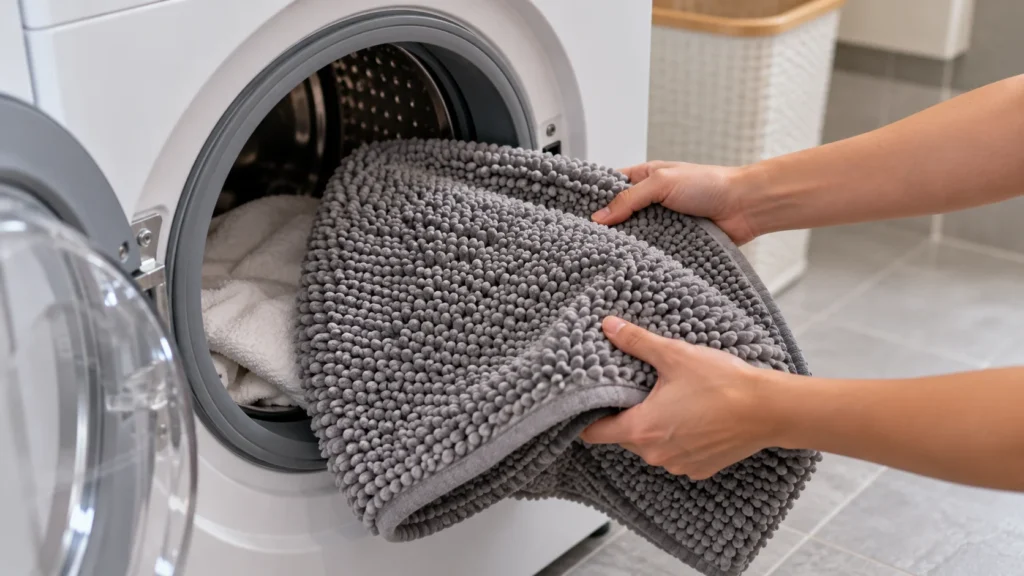
How to clean bathroom rugs
- Check the care label before washing.
- Shake or vacuum away loose hair and dust.
- Machine-wash only if the rug’s label permits it.
- Use a suitable detergent and follow the recommended water temperature.
- Avoid overloading the washing machine.
- Dry the rug fully according to its care instructions before placing it back on the floor.
Some rugs have rubber backing that can deteriorate with high heat or unsuitable washing methods. Others may require handwashing or professional cleaning. If a bath mat stays damp for long periods, hang it up after use or replace it with a material that dries more easily.
Do not forget these bathroom accessories
- Toothbrush holder: Remove accumulated residue and clean the inside and outside.
- Soap dispenser: Wipe the pump, neck, and base.
- Shower curtain: Follow the manufacturer’s washing instructions.
- Wastebasket: Empty it, clean the interior, and dry it before replacing the liner.
- Shelves and organizers: Remove dust and soap residue from the corners.
- Light switches and door handles: Clean carefully without allowing liquid into electrical parts.
- Bath mats and towels: Hang them so they can dry fully between uses.
High-touch areas such as faucet handles, door handles, and toilet flush controls deserve regular attention because many people touch them throughout the day.
How Often Should You Clean a Bathroom?
There is no single schedule that suits every household. A bathroom used by several people may need more frequent attention than a rarely used guest bathroom. Visible dirt, lingering moisture, odors, and the speed at which surfaces become dirty are useful indicators.
| Cleaning task | Practical starting schedule |
| Wipe sink and faucet | Daily or every few days |
| Clean toilet and high-touch areas | Several times a week, as needed |
| Clean shower, bathtub, and visible tile residue | Weekly |
| Clean bathroom floor | Weekly or more often if needed |
| Wash bath mats and towels | Weekly, or sooner if damp or dirty |
| Clean mirror | When marks appear, often weekly |
| Clean grout and corners more thoroughly | Weekly or when buildup appears |
| Dust bathroom fan grille | Every few months or when dusty |
| Deep-clean shelves, accessories, and hidden edges | Monthly or as needed |
These are practical starting points rather than strict hygiene rules. Adjust the schedule for household size, bathroom use, pets, ventilation, and the presence of children or people who need additional infection-control precautions.
How to keep a bathroom clean between deep cleans
- Wipe the sink after brushing teeth or shaving.
- Hang towels and bath mats so they dry properly.
- Use a squeegee on shower walls or doors when appropriate.
- Remove hair from the shower drain before it accumulates.
- Put toiletries back in their places after use.
- Run the exhaust fan during showers and for about 20 minutes afterward, where suitable for your fan and room.
- Deal with spills and visible dirt promptly instead of letting them build up.
- Keep cleaning cloths and tools clean and allow them to dry between uses.
Small, regular tasks reduce the amount of buildup you need to remove during a deep clean.
A Simple Bathroom Cleaning Checklist
Use this checklist when you want to clean the whole room without forgetting less obvious areas.
Bathroom cleaning checklist
0 of 13
Remove towels, bath mats, toiletries, and trash
Dust shelves, light fixtures, and accessible vent grilles
Clean shower walls, bathtub, and bathroom tiles
Scrub grout and corners where residue has accumulated
Clean the sink basin, drain area, faucet, and handles
Clean the mirror and other glass surfaces
Wipe cabinets, shelves, and door handles
Clean the toilet, including the base and flush handle
Check walls and ceiling for moisture or mold
Vacuum or sweep the floor
Mop the floor with a suitable cleaner
Wash and dry bath mats and replace clean towels
Make sure surfaces are dry and ventilation is working
Reset checklist
Use the checklist as a guide rather than a requirement to use every cleaning product every time. Choose the appropriate tasks based on the bathroom’s condition and your household’s needs.
Conclusion
Learning how to clean a bathroom becomes much easier when you follow a consistent routine and use the right products for each surface. Start by removing clutter and dust, clean the shower and tiles, scrub the sink and grout, wipe the mirror and fixtures, check the exhaust fan, and finish with the floor. Pay particular attention to moisture-prone areas such as grout lines, ceiling corners, sink drains, and shower edges, where dirt and dampness can accumulate. A simple checklist can help you cover the whole room without repeating tasks or overlooking hidden areas.
For lasting results, focus on prevention as well as cleaning. Wipe away splashes, dry bath mats and towels, keep drains clear, and use the exhaust fan during and after showers. If mold repeatedly returns, surfaces remain damp, or you notice peeling paint or water damage, investigate the underlying moisture problem instead of relying on repeated scrubbing. Always follow product labels, avoid mixing cleaning chemicals, and choose methods that protect your bathroom’s materials. With regular maintenance and occasional deep cleaning, you can keep your bathroom looking fresh, tidy, and comfortable.
1. What is the best way to clean a bathroom quickly?
Remove clutter first, then clean the sink, shower, toilet, mirror, and floor in a consistent order. Use a suitable cleaner, allow the recommended contact time, and finish with the floor. Regularly wiping surfaces between deeper cleans helps reduce the work required.
2. How do you deep clean a bathroom?
Start by removing towels, bath mats, toiletries, and trash. Dust high surfaces, clean the shower and tiles, scrub grout and the sink, clean the toilet and mirror, wipe accessories and touch points, inspect the fan and any damp areas, and mop the floor last. Finish by drying surfaces and improving ventilation.
3. What should you use to clean bathroom tiles and grout?
Use a tile cleaner that is compatible with your tile material and a grout-compatible cleaning product for dirty grout lines. A soft sponge and grout brush can help loosen residue. Check manufacturer instructions before using acidic products, bleach, or abrasive tools, particularly on natural stone and delicate finishes.
4. How do you clean mold on a bathroom ceiling or walls?
First, identify and reduce the moisture source. For a small area on a suitable washable surface, use an appropriate cleaning method while wearing recommended protective equipment and maintaining ventilation. Do not mix cleaning products or simply paint over mold. Seek professional help for extensive growth, recurring mold, damaged drywall, or significant water damage.
5. How often should you clean your bathroom?
Wipe the sink and visible splashes regularly, clean the toilet and high-touch areas as needed, and aim to clean the shower, bathtub, and floor about weekly as a starting point. Wash towels and bath mats regularly, and clean the exhaust fan grille when dust accumulates. Adjust the schedule according to bathroom use, moisture, and how quickly surfaces become dirty.