
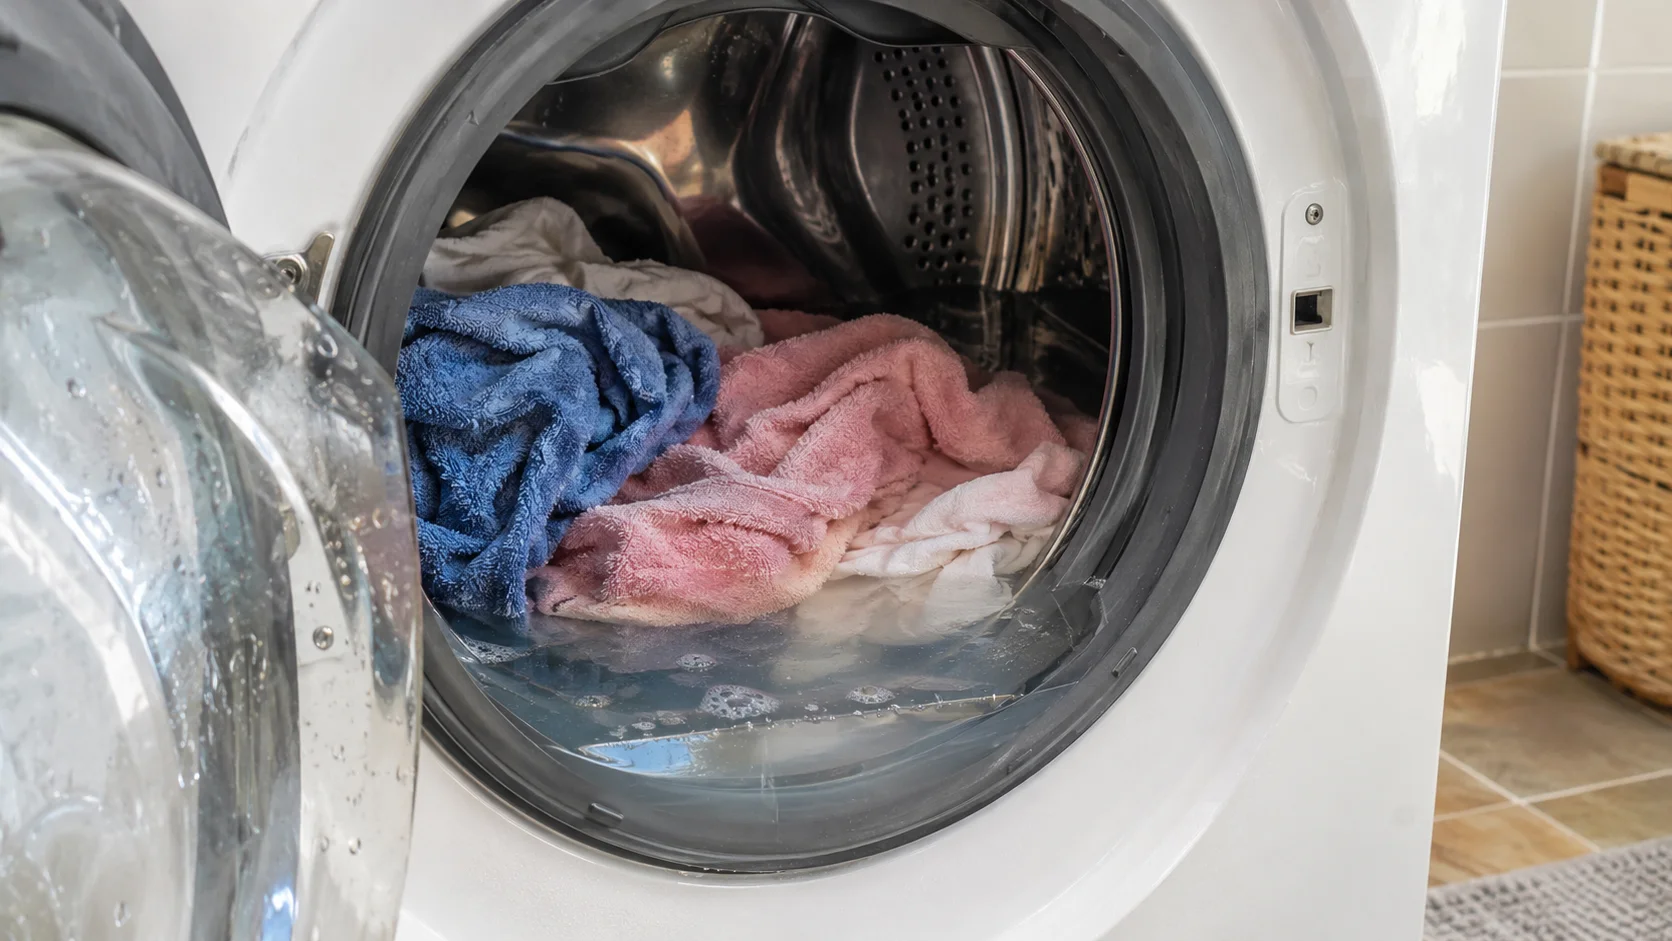
Opening your washing machine after a cycle and finding a tub full of water can be frustrating. Clothes may be soaking wet, the cycle may refuse to finish, or the machine may display a drainage error and stop working. Sometimes the problem is as simple as a kinked drain hose or a blocked filter. In other cases, a faulty drain pump, an obstructed household drain, or an electrical issue may be responsible.
Before calling an appliance repair technician, you can safely check several common causes yourself. The key is to work in the right order, beginning with simple external checks and moving toward components that require more care. Washing machines vary by brand and design, so always follow the owner’s manual for your specific model.
This guide explains how to fix a washing machine that is not draining, how to remove leftover water safely, and what to check on front-load and top-load machines. It also covers Whirlpool, Maytag, Samsung, and other common washer brands, plus warning signs that mean it is time to seek professional service. Let’s learn how to fix a washing machine not draining with practical troubleshooting steps
Why Is My Washing Machine Not Draining?
A washer drains through a system that usually includes a drain pump, internal passages, a drain hose, and a household standpipe or laundry sink. If any part of that route becomes blocked or stops working, water can remain in the drum. The machine may also prevent spinning when it detects that water has not drained properly.
The most common causes include a clogged drain filter, a bent or obstructed hose, an overloaded drum, or a blocked household drain. Mechanical faults, such as a damaged pump or a failed lid or door-lock component, are also possible. Identifying the symptoms before taking anything apart helps you avoid unnecessary repairs.
Common Signs of a Drainage Problem
- Water remains in the drum at the end of a wash cycle.
- Clothes come out much wetter than usual.
- The washer stops before the spin cycle.
- A drain-related error code appears on the display.
- The machine makes a humming sound but does not pump water out.
- Water drains slowly or returns to the drum.
- An unpleasant smell develops around the washer.
- Water leaks near the drain hose or pump-access area.
These symptoms can overlap with other problems, so use them as clues rather than proof of a specific failed part.
Safety Steps Before Troubleshooting
Water and electricity are a dangerous combination. Before inspecting a washer, turn it off and unplug it from the electrical outlet if you can reach the plug safely. If water is near the outlet, plug, or power cord, do not step into the water or touch the electrical connection; switch off the circuit breaker only if you can do so safely, and seek qualified assistance.
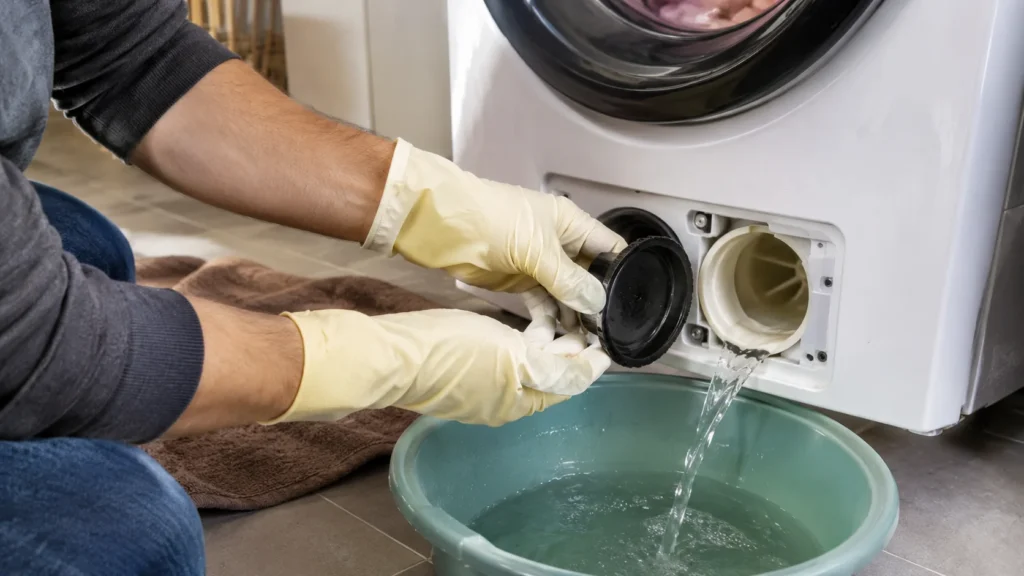
Allow hot wash water to cool before draining it manually. Keep towels and a shallow container nearby, and wear gloves if you expect to handle dirty water or debris. Never reach into a running machine, bypass a door or lid lock, or remove panels while the appliance is connected to power.
Check your owner’s manual before opening a filter access panel or disconnecting a hose. Some washers have a small emergency drain tube, while others require a different procedure. If the model does not provide a user-accessible filter, do not force open the machine to find one.
Step-by-Step: How to Fix a Washing Machine That Won’t Drain
Start with the easiest checks before considering internal repairs. You may be able to solve the problem without replacing any parts, especially if the cause is an incorrect setting, an unbalanced load, or a visible hose obstruction.
Step 1: Check the Cycle and Spin Settings
Some washing machines retain more water when a delicate cycle, low-spin option, or no-spin setting is selected. A cycle may also pause before draining if the machine detects an unbalanced load or an interrupted program.
Check the control panel to see which cycle is active. If your model offers a separate Drain and Spin or Spin Only option, consult the manual to confirm when and how to use it. If there is no electrical hazard, visible leak, or mechanical warning, try the appropriate drain cycle once.
If the machine drains normally afterward, the issue may have been related to the selected program rather than a blocked component.
Step 2: Redistribute the Laundry Load
Heavy towels, blankets, bath mats, and other bulky items can collect on one side of the drum. When the load becomes unbalanced, some washers reduce the spin speed or pause the cycle to limit vibration. The clothes may then feel much wetter than usual.
Turn the machine off and wait until the door or lid unlocks naturally. Redistribute the clothes evenly and remove some items if the drum is overloaded. Do not force the door open while water remains inside.
Try a suitable spin or drain cycle again. If the washer repeatedly stops with different loads, investigate other causes rather than assuming that load balance is the only problem.
Step 3: Inspect the Drain Hose for Kinks
The drain hose carries used water from the washer into a standpipe, laundry sink, or other approved drain connection. If the hose is crushed behind the machine, sharply bent, or pinched between the washer and the wall, water may not flow out properly.
Pull the washer away from the wall only if you can do so safely without straining the hoses or power cord. Examine the entire visible length of the drain hose and straighten any obvious bends. Make sure the machine is not pressing the hose against the wall when returned to its position.
Also check that the hose has not slipped, become damaged, or been installed contrary to the manufacturer’s instructions. Correct hose height and installation matter because an incorrectly positioned hose can cause drainage or water-return problems. Whirlpool and Maytag both recommend checking hose routing and installation requirements when troubleshooting drainage issues.
Step 4: Check for a Clogged Drain Hose or Household Drain
A hose can look normal from the outside while lint, detergent residue, or small objects restrict the inside. The household drain can also be blocked, especially if a laundry sink or nearby fixture drains slowly.
First, check for visible problems at the hose outlet and watch for signs that the household drain is backing up. If the hose must be disconnected, unplug the washer, turn off the water supply as appropriate, and prepare a bucket and towels. Follow your model’s manual because some hose connections retain water and require specific handling.
Do not force a sharp tool through the hose or use harsh chemical drain cleaners inside the washer. These methods may damage components or create a chemical hazard. If the hose is difficult to remove or the blockage is out of reach, a qualified appliance technician or plumber can identify the restriction.
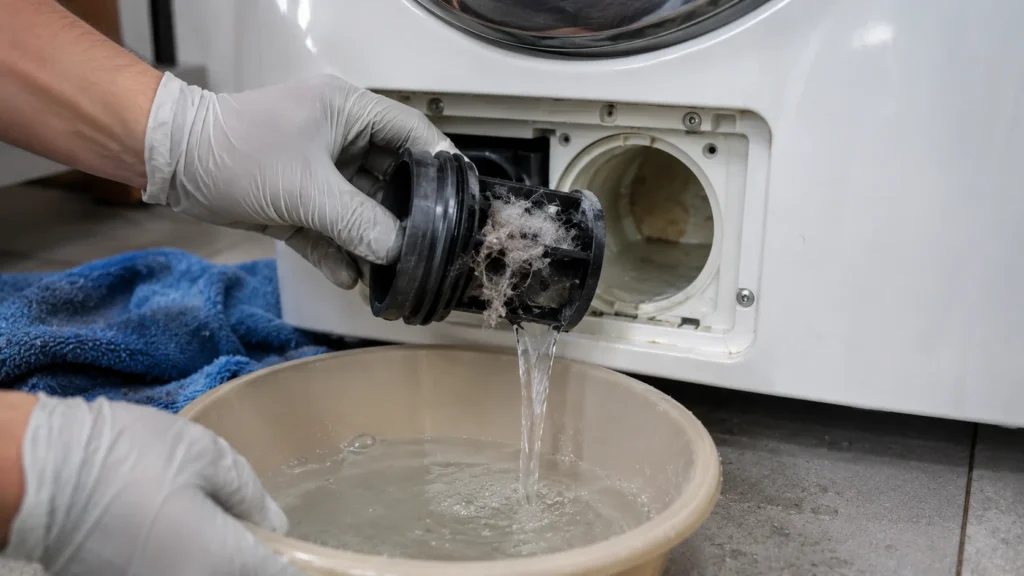
Step 5: Clean the Drain Pump Filter, If Your Model Has One
A clogged pump filter is a common reason a washer cannot drain. It may collect lint, hair, coins, buttons, and other small objects that escape from pockets or clothing. However, not all washers have a user-accessible drain filter, so check the manual before searching for one or removing a panel.
For a washer with a user-accessible filter, use this general procedure:
- Switch off and unplug the washing machine.
- Find the filter access area specified in the manual, often near the lower front of a front-load washer.
- Place towels and a shallow tray underneath.
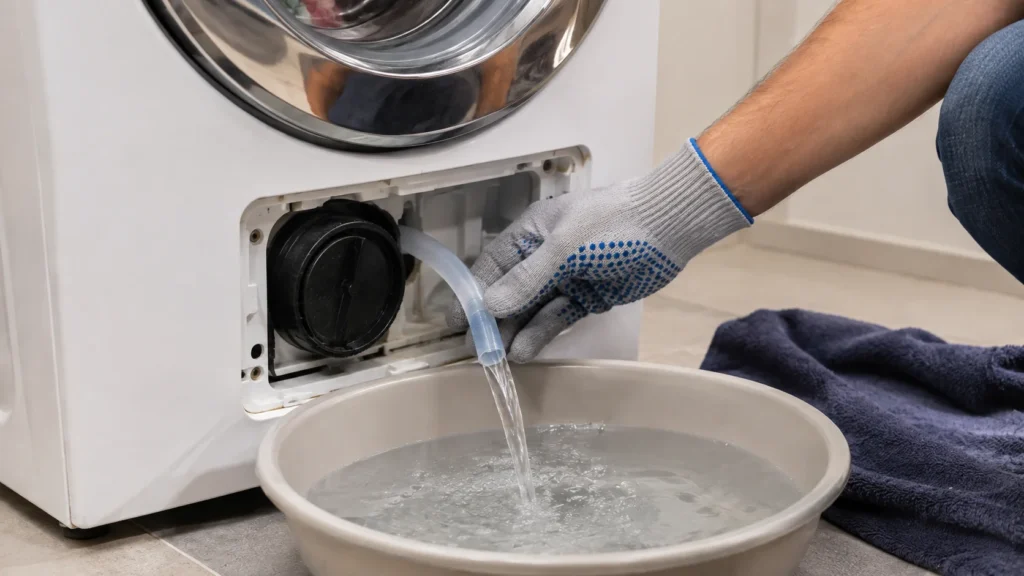
- If an emergency drain tube is provided, use it according to the manual to release water in small amounts.
- Open the filter slowly because water may still be trapped inside.
- Remove lint and debris, then rinse the filter as instructed.
- Check the accessible filter housing for loose debris without reaching into unsafe areas.
- Reinstall the filter securely and close the access panel.
Do not unscrew a filter quickly when the drum is full of water. A large volume may spill onto the floor. If your top-load washer has no accessible filter, do not dismantle it just to perform this check. Samsung’s official support guidance also recommends checking the appropriate filters and hose connections, while emphasizing that instructions can vary by model.
Step 6: Listen for Drain Pump Problems
The drain pump moves water out of the washer. A humming sound without water movement can suggest an obstruction or a pump problem, while grinding, rattling, or unusual silence may point to different faults. None of these sounds alone confirms that the pump has failed.
After checking the accessible hose and filter, listen during a normal drain cycle only if the machine is safe to operate and the manual permits the test. Stop immediately if you smell burning, hear severe grinding, see a leak, or notice electrical problems.
Do not reach through openings or attempt to turn a pump impeller while the appliance is connected to power. Pump replacement may involve electrical connections, seals, and internal components, so it is generally best left to a qualified technician unless you have the appropriate repair experience and model-specific instructions.
Step 7: Check the Lid or Door Lock
Some washers will not proceed through their normal drain or spin sequence if the control system detects that the lid or door is not properly closed. A damaged latch, misaligned door, or faulty lock switch can interrupt the cycle.
Open the washer only after it has stopped and unlocked normally. Check for clothing caught between the door and its seal, and remove anything that prevents the door from closing properly. Then close it firmly and try the appropriate cycle.
Never bypass a lid switch, defeat a door lock, or press a switch manually to trick the machine into operating. If the lock indicator flashes, the door will not secure, or the same problem returns, consult the manual or arrange a repair.
Step 8: Reset the Washer When Appropriate
A temporary control glitch or interrupted cycle can sometimes leave the machine unable to complete draining. If your owner’s manual recommends a reset, follow the exact procedure for your model. Some washers reset after being disconnected from power for a specified period; others have a dedicated control sequence.
Before resetting, make sure the drum is not dangerously full of water and that no leak or electrical fault is present. A reset cannot clear a physical blockage or repair a failed pump, so avoid repeatedly restarting a washer that makes abnormal noises or shows the same drainage error.
If the washer returns to normal operation, observe the next cycle. If the issue persists, record any displayed error code and use the manufacturer’s troubleshooting guide.
Step 9: Call a Technician if the Problem Continues
If the hose and accessible filter are clear but the washer still will not drain, the problem may involve a failed pump, internal obstruction, wiring fault, sensor, or control component. These issues often require testing that cannot be completed safely through routine user maintenance.
Contact a qualified appliance technician if the machine repeatedly retains water, trips a circuit breaker, leaks from underneath, or produces a burning smell. You should also seek professional help if accessing the suspected component requires removing internal panels or working near electrical connections.
Before arranging service, note the model number, any error code, when the problem occurs, and which basic checks you have completed. That information can make diagnosis more efficient.
Jump into Other Related Article
- Best Deck Stain and Sealer | Complete Guide for Pressure Treated, Cedar, Old, and Full Sun Decks
- Best Tub Cleaner | 7 Effective Options for Soap Scum, Hard Water, and Tough Stains
- How to Clean Floor Tile Grout Without Scrubbing | Easy, Low-Effort Methods
How to Drain a Washing Machine Full of Water
If the washer is full of water, remove the water carefully before attempting other checks. The safest method depends on whether the machine is a front-loader or top-loader and whether it provides an emergency drain tube.
Draining a Front-Load Washer
Many front-load washers have a small access panel near the bottom front. Some models include a narrow emergency drain hose beside the pump filter. With the washer unplugged and a tray ready, use the drain tube as directed in the manual, emptying the container as needed.
If there is no emergency drain tube, do not immediately remove the filter cap while the drum is full. Water may pour out rapidly. Check the manufacturer’s procedure or contact a technician if you cannot control the flow.
Draining a Top-Load Washer
Top-load washers may not have an accessible pump filter or emergency drain tube. If the manual provides a safe manual-draining method, follow it precisely. Otherwise, avoid tilting the machine or disconnecting internal hoses while it contains water.
Never move a heavy, water-filled washer by yourself. If the water cannot be removed using the model’s intended method, professional assistance is the safer option. Maytag’s guidance similarly distinguishes between front-load and top-load draining procedures and recommends checking model-specific instructions.
Brand-Specific Washing Machine Drainage Troubleshooting
Although the basic causes are similar across many washing machines, filter locations, error codes, and reset procedures differ by brand. Use the following guidance as a starting point, not a substitute for the instructions for your exact model.
Whirlpool Washing Machine Not Draining
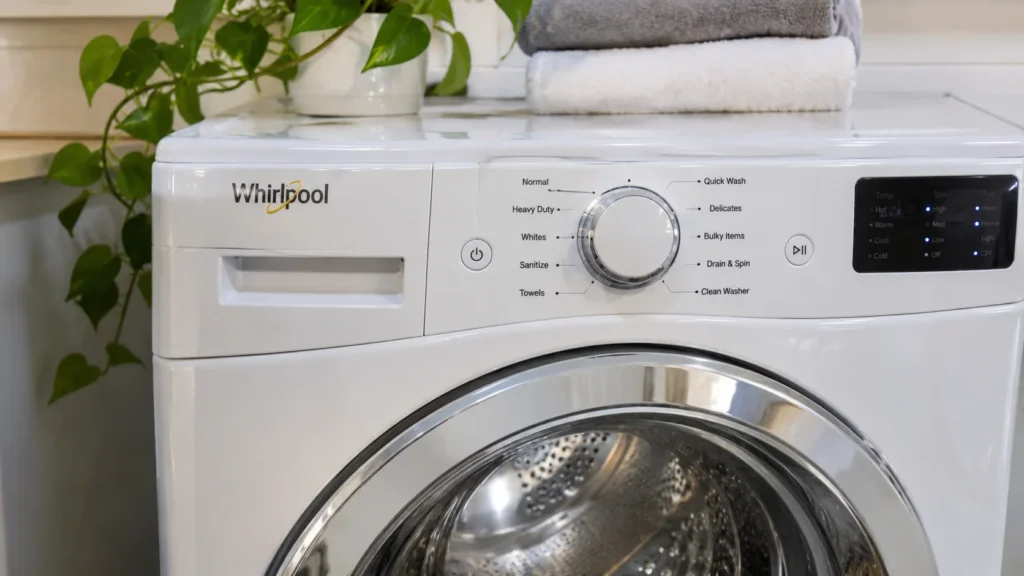
For a Whirlpool washer, check the cycle selection, load balance, and drain hose first. If your model has a user-accessible drain pump filter, inspect and clean it according to the owner’s manual. Some models do not have an accessible filter, so avoid removing panels unnecessarily.
If the machine continues to retain water, consult the official Whirlpool drainage troubleshooting guide. It explains common causes such as incorrect spin settings, hose installation, and filter obstructions.
Maytag Washer Not Draining
For a Maytag washer, check whether the load is balanced and the selected cycle uses an appropriate spin speed. Inspect the drain hose for kinks and confirm that it is installed at the correct height for your model. Clean an accessible filter only by following the manufacturer’s instructions.
If the machine remains full of water, use Maytag’s guide to draining a washing machine for model-appropriate guidance.
Samsung Washing Machine Not Draining
Some Samsung washers display an error when drainage is restricted. Record the displayed code and look it up in the manual for your model rather than assuming every code means the drain pump has failed.
Check the hose for twisting or obstruction and inspect the debris filter if your washer has one. Samsung provides official washing machine drainage troubleshooting with filter and hose checks. If cleaning does not resolve the issue, contact Samsung support or a qualified technician.
GE, LG, and Kenmore Washing Machines
For GE, LG, and Kenmore washers, begin with the same external checks: cycle settings, load balance, drain hose routing, and any user-accessible filter. The exact filter location, error-code meanings, and reset procedure vary by model.
Consult the appropriate owner’s manual or official support site before disconnecting hoses or opening panels. If the manual does not describe a user-accessible filter, do not assume one is present. Persistent drainage failures may require a technician to test the pump, lock mechanism, wiring, or control system.
15 Practical Tips to Prevent Washing Machine Drainage Problems
Regular maintenance can reduce the likelihood of recurring clogs and drainage interruptions. These habits are simple, but consistency matters.
- Check pockets before washing. Coins, tissues, hairpins, and small objects can enter the drain system.
- Follow the load-size recommendations. An overloaded drum can interfere with proper spinning.
- Distribute laundry evenly. Balance bulky items to reduce excessive vibration and spin interruptions.
- Use the recommended detergent amount. Excess detergent can contribute to residue buildup, especially in high-efficiency machines.
- Inspect the drain hose periodically. Look for kinks, crushing, cracks, and loose connections.
- Keep the hose correctly positioned. Follow the installation height and routing specified for your model.
- Clean an accessible pump filter regularly. Use the schedule and method recommended by the manufacturer.
- Avoid forcing tools into a blocked hose. Sharp or rigid objects can puncture the hose or damage nearby components.
- Do not pour chemical drain cleaner into the washer. It may damage components or create a hazardous mixture.
- Clean the washer drum as recommended. A suitable maintenance cycle can help manage detergent and soil buildup.
- Inspect the household drain. Slow drainage from a laundry sink or nearby fixture may indicate a plumbing blockage.
- Avoid pushing the washer tightly against the wall. Leave enough space to prevent the drain hose from being crushed.
- Pay attention to unusual noises. Humming, grinding, or repeated rattling during draining deserves investigation.
- Record recurring error codes. The exact code and when it appears can help identify the fault.
- Arrange repairs early. A persistent drainage issue is easier to diagnose before it causes repeated cycle interruptions or water spills.
Common Mistakes to Avoid When Fixing a Washer That Won’t Drain
Troubleshooting is more effective when you avoid actions that can turn a minor blockage into a larger repair.
Opening the Filter Without Preparing for Water
A filter cap can release a substantial amount of water, especially if the tub is still full. Place a shallow container and towels underneath, and use the emergency drain tube if your model provides one. Open the filter slowly and stop if you cannot control the flow.
Assuming Every Washer Has a Removable Filter
Some washers have a user-accessible debris filter, while others use different designs or do not provide a filter intended for routine consumer cleaning. Check the manual before removing panels or searching inside the appliance.
Replacing the Drain Pump Too Quickly
A washer that will not drain does not automatically need a new pump. A kinked hose, blocked filter, unbalanced load, or household drain problem can produce similar symptoms. Rule out straightforward causes first and leave electrical or internal mechanical diagnosis to a qualified professional.
Ignoring Water Leaks or Electrical Warning Signs
If water is near electrical connections, the power cord is damaged, the circuit breaker trips, or you smell burning, stop troubleshooting. Do not touch wet electrical equipment. Arrange qualified assistance before using the washer again.
Conclusion
When a washing machine is not draining, the cause may be a simple hose kink, an incorrect cycle setting, an unbalanced load, or debris in an accessible pump filter. Checking these possibilities in a safe order can help you identify the problem without replacing parts unnecessarily.
Always disconnect power before inspecting accessible components, prepare for trapped water before opening a filter, and follow the instructions for your exact washer model. If the machine continues to retain water after basic checks or shows signs of leaking, electrical trouble, or pump failure, contact a qualified appliance technician.
A little preventive care, including checking pockets, avoiding overloaded loads, and maintaining the drain system as recommended, can help your washing machine drain properly and keep laundry day running smoothly.
Why is my washing machine full of water and not draining?
Common causes include a clogged drain hose, a blocked pump filter, an obstructed household drain, or a faulty drain pump. An interrupted cycle or incorrect spin setting may also leave excess water behind. Start with the manual’s recommended basic checks and avoid opening components while the machine is powered.
How do I fix a washing machine that won’t drain or spin?
Check that the load is balanced, the correct cycle is selected, and the drain hose is not kinked. If your model has a user-accessible pump filter, inspect it according to the manual. If the washer still will not drain or spin, the pump, lid or door lock, or another internal component may need professional diagnosis.
Can I force my washing machine to drain?
Some models offer a Drain and Spin cycle or an emergency drain tube. Use these features only as directed in the owner’s manual. If the machine is leaking, making abnormal noises, or showing electrical warning signs, do not attempt to force a cycle.
How do I know if my washing machine drain pump is broken?
Possible warning signs include a humming pump without water movement, unusual grinding, repeated drainage errors, or water remaining after the accessible hose and filter have been checked. These symptoms can also result from blockages, so they do not prove that the pump has failed. A technician can test the pump and related components.
Why does my washer drain slowly but not completely?
A partial obstruction in the drain hose, filter, or household plumbing may restrict water flow. Incorrect hose installation or a pump that is not operating properly can also cause incomplete drainage. Inspect accessible parts safely and consult your manual if the problem persists.
How often should I clean my washing machine drain filter?
Follow the cleaning interval in your owner’s manual. For washers with a user-accessible pump filter, periodic cleaning may be recommended monthly or more frequently depending on use and the manufacturer’s instructions. Check the filter sooner if drainage slows or debris accumulates.
Is it safe to use vinegar to unclog a washing machine drain?
Vinegar is not a reliable fix for a blocked drain hose or failed pump. Use only cleaning products and maintenance procedures approved by the washer manufacturer. Never mix vinegar with bleach or other drain-cleaning chemicals, as dangerous reactions can occur.
Should I call a plumber or an appliance repair technician?
A plumber may be the right choice if the household standpipe or laundry sink is blocked. An appliance technician is better suited to diagnosing a faulty pump, lock, wiring, sensor, or internal washer obstruction. If the source is unclear, describe the symptoms to a qualified service provider before deciding.