Author name: Adam Smith

How to Remove Food Stains from Clothes | Grease, Oil, Sauce, Baby Food & More
Uncategorized

How to Remove Food Stains from Clothes | Grease, Oil, Sauce, Baby Food & More

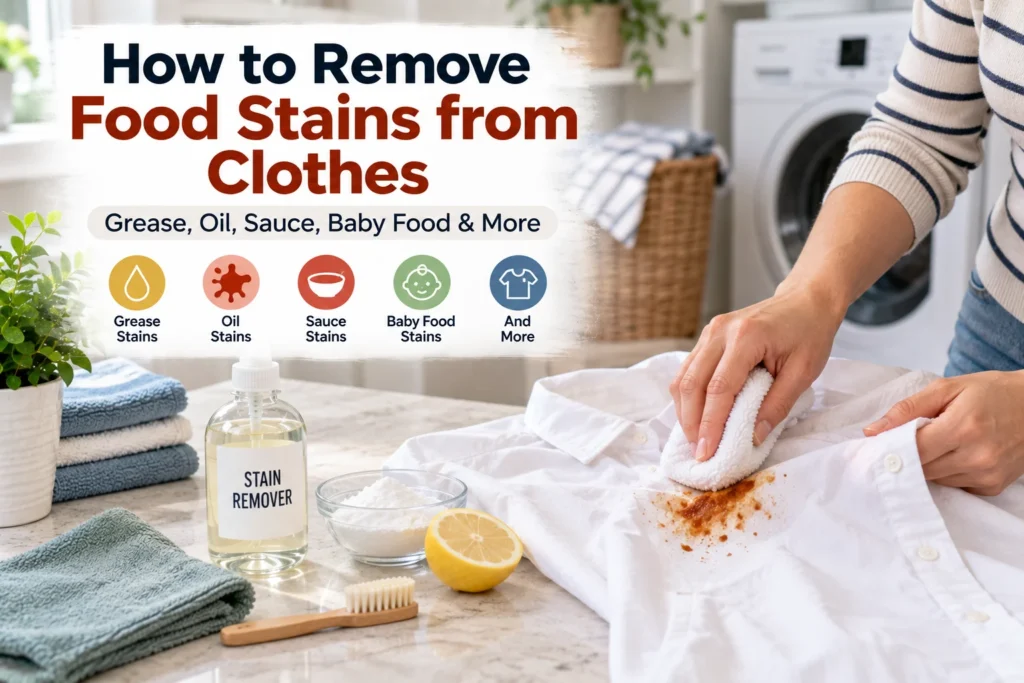
How to Remove Food Stains from Clothes. A meal can leave behind grease, oil, tomato sauce, curry, chocolate, coffee, juice, baby food, food coloring, or a combination of several stain types. The right treatment depends on what caused the stain, how long it has been there, and what the garment is made from. The most important rule is to treat the stain before drying the clothing. Remove excess food first, pretreat the affected area, wash according to the care label, and check the result before using a heated dryer. OxiClean and Tide both recommend prompt pretreatment for many food and grease stains.  What Is the Best Way to Remove Food Stains from Clothes? The best general method is to remove as much food as possible before applying a cleaner. Scrape away thick or dried food with a dull utensil, then blot liquid or greasy residue rather than rubbing it deeper into the fabric. For washable clothing, a suitable laundry detergent or stain pretreatment can then be applied before washing. OxiClean recommends checking the garment care label, testing products on an inconspicuous area, pretreating the stain, and washing according to the manufacturer’s recommended temperature.  Different food stains need different approaches. Grease and oil need attention to their oily component, while protein-based foods such as egg and dairy can require different treatment. UGA Cooperative Extension specifically warns that hot water can set an egg stain.  15-Step Food Stain Removal Method Use this basic routine for most washable clothing, then adjust it according to the particular food and fabric. For commercial stain removers, always follow the specific label because application times, fabric restrictions, and washing instructions vary.  How to Get Food Stains Out of Clothes Fresh food stains are usually easier to manage than old, dried stains. Begin by removing solid food without pushing it farther into the fibers. For a liquid stain, blot from the outside toward the center to limit spreading. Next, apply an appropriate laundry stain remover or detergent. OxiClean’s general food-stain guidance covers common stains such as juice, berries, wine, chocolate, coffee, BBQ sauce and other food and drink spills.  After treatment, wash the garment according to its care label. Do not automatically choose the hottest possible water because some fabrics and dyes have specific temperature limitations. How to Remove Food Grease and Oil Stains from Clothes Greasy foods can be particularly stubborn because oils and grease are hydrophobic and can cling to fabric fibers rather than rinsing away easily with water.  For a fresh grease stain, first remove excess food and oil. Tide recommends rinsing the affected area when possible, gently working dish soap into a grease stain, rinsing, and then pretreating with laundry detergent before washing.  For older food grease stains, a dedicated stain pretreatment may be useful. OxiClean recommends pretreatment followed by washing at the warmest temperature the fabric can safely accept.  Do not put the garment into a heated dryer while the grease mark is still visible. Heat can contribute to setting some stains. How to Remove Old Food Stains from Clothes Old food stains can be harder because they may have dried into the fibers or been exposed to heat during an earlier wash or drying cycle. OxiClean explains that stains can become set when exposed to heat, including when stained clothing is placed in a dryer before the stain has been removed.  For washable clothing, pretreat the old stain with a suitable product and allow the recommended treatment time. Some products provide a soaking option for particularly stubborn stains, followed by normal washing.  If the stain remains after washing, repeat the treatment rather than immediately applying more heat. Very old stains may not disappear completely, especially if the original food contained dyes or if the fabric itself has been permanently discolored. How to Remove Food Stains from White Clothes White clothing makes food stains especially visible, but stronger cleaning is not always the safest choice. Start by removing the food and pretreating the stain with a product suitable for washable whites. For food and grease stains, OxiClean provides separate guidance for washable white clothing and recommends following the garment label and product instructions.  Avoid chlorine bleach unless the garment’s care instructions specifically allow it. A stain remover that is safe for washable whites can be a better option when the label permits it. How to Remove Food Stains from Colored Clothes Colored clothing requires extra attention to colorfastness. Always test a new stain-removal product in an inconspicuous location before treating a visible area. OxiClean specifically recommends testing its stain-removal products first and notes that certain products should not be used on wool, silk, leather, or dry-clean-only fabrics.  If the garment is brightly dyed, vintage, or especially valuable, use the manufacturer’s cleaning instructions rather than experimenting with strong household chemicals. How to Remove Baby Food Stains from Clothes Baby food can contain fruit, vegetables, oils, dairy, proteins, and brightly colored ingredients, so the appropriate treatment depends on what is actually in the food. Remove excess baby food first and rinse or blot according to the garment and stain type. For washable clothing, pretreat the stain and launder according to the care label. OxiClean specifically includes baby stains among the types of tough clothing stains for which pretreatment and soaking can be useful.  For old baby food stains, avoid drying the garment until you have checked whether the stain has disappeared. How to Remove Indian Food, Curry and Turmeric Stains from Clothes Indian food can leave particularly noticeable stains because dishes may contain oil, tomato, turmeric, chili, spices and other strongly colored ingredients. A curry stain may therefore require treatment for both the greasy and colored components. First scrape away excess food and blot the area. Then use a stain treatment appropriate for the garment and wash according to its care label. For turmeric or strongly pigmented stains, avoid immediately applying random household chemicals. Test any stain remover first because aggressive treatment can alter the garment’s original dye as well as the food stain. […]

How to Remove Stains from Carpet | Complete Guide for Coffee, Pet, Wine, Urine & More
Uncategorized

How to Remove Stains from Carpet | Complete Guide for Coffee, Pet, Wine, Urine & More

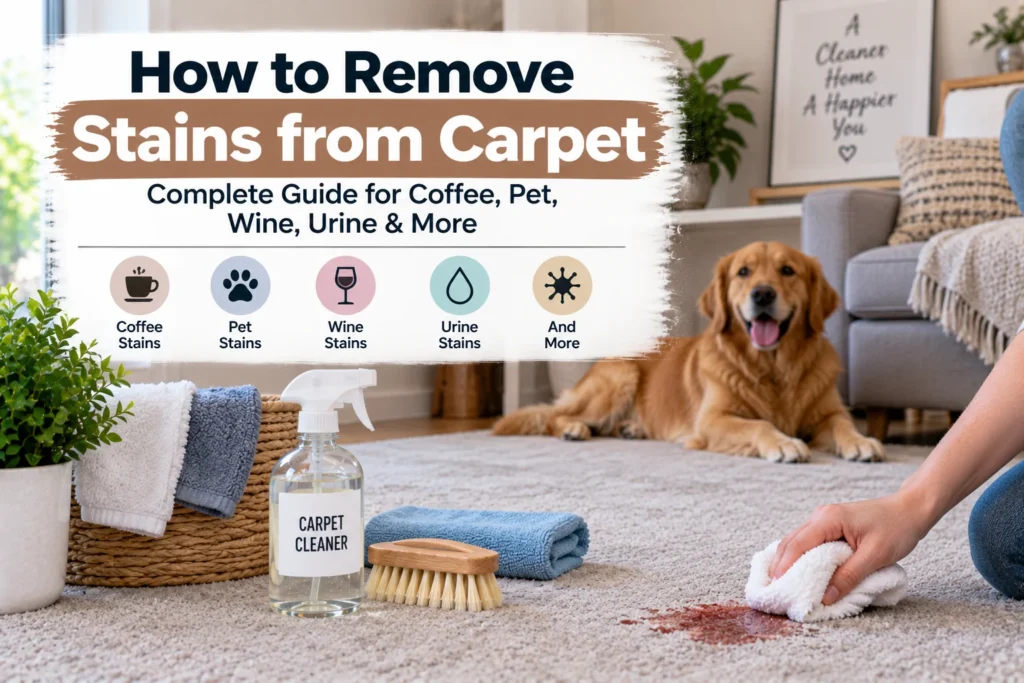
How to Remove Stains from Carpet , wine, food, pets, makeup, mud, oil, paint and everyday spills. The key to successful carpet stain removal is usually acting quickly, blotting instead of scrubbing, using an appropriate cleaning solution, rinsing away residue and drying the area thoroughly. The Carpet and Rug Institute (CRI) specifically recommends blotting rather than scrubbing because aggressive rubbing can damage carpet fibers and change their texture.  Old stains can require more patience, and some discoloration may involve permanent dye or fiber damage rather than removable surface soil. Before treating any carpet, check the manufacturer’s care instructions and test a cleaning solution in an inconspicuous area. What Is the Best Way to Remove Stains from Carpet? The best general approach is to remove as much of the spill as possible before applying cleaner. Liquid spills should be blotted with a clean white absorbent cloth or paper towel, while semi-solid or dried material should be gently scraped or vacuumed away first.  Never assume that using more cleaner will produce better results. CRI recommends applying a small amount of an appropriate product to a white cloth, working from the outside of the stain toward the center, and blotting rather than rubbing. After treatment, rinse away remaining cleaner and dry the area thoroughly.  15 Essential Steps for Cleaning Carpet Stains Use this basic process for many ordinary carpet spills, adjusting the cleaning product according to the specific stain and carpet fiber. CRI recommends this blotting, testing, controlled-application and rinsing approach as a general best practice for carpet spot removal.  How to Remove Coffee Stains from Carpet Coffee is one of the most common carpet spills, and treating it promptly can prevent it from becoming more difficult to remove. Start by blotting as much liquid as possible with a white towel. Do not rub the coffee outward because this can spread the stain and disturb the carpet texture. Apply a suitable carpet stain remover or an appropriate mild detergent solution to a cloth, then blot from the outside inward. Continue until the towel is no longer picking up coffee. Rinse the treated area with clean water and blot it dry. CRI includes coffee among stains that can respond to controlled blotting and appropriate spot-treatment methods.  For old coffee stains, repeat the treatment rather than soaking the carpet with a large quantity of cleaner. How to Remove Old Stains from Carpet Old stains are more challenging because the material may have dried into the fibers or been exposed to previous cleaning attempts. Start by removing any dry residue with a vacuum or gentle scraping tool. Apply a carpet-safe stain remover according to its label and allow the recommended dwell time. Good Housekeeping’s 2026 testing of carpet stain removers included both fresh and overnight stains and found that product performance varies considerably by stain and formula.  If repeated spot treatment does not improve a large or deeply embedded stain, professional extraction may be more appropriate than repeatedly adding household chemicals. How to Remove Blood Stains from Carpet For fresh blood, cool water is a sensible starting point. CRI recommends quickly rinsing blood spots with cool water and then using an appropriate carpet-cleaning solution or a carefully measured mild dishwashing-detergent solution.  Blot rather than scrub, and avoid spreading the stain into surrounding fibers. Once the visible blood has been lifted, rinse away cleaning residue and dry the carpet. For large, old or heavily absorbed blood stains, especially on expensive rugs, professional cleaning may be safer. How to Remove Pet Stains, Dog Pee and Cat Urine from Carpet Pet urine requires more than simply making the visible yellow mark disappear. Urine can affect carpet dyes, backing and odor, and CRI notes that some older urine damage may not be completely removable.  For a fresh accident, absorb as much liquid as possible with white paper towels. CRI recommends controlled blotting with a mild non-bleach, non-lanolin dishwashing-detergent solution followed by rinsing and drying. It also notes that enzyme-based products are available for pet odors and stains.  Do not steam-clean urine spots as your first response. CRI advises against steam cleaning urine because heat can set the stain and odor; extraction and cool-water rinsing are preferable approaches.  For old dog pee stains, old cat urine stains, yellow urine stains or recurring odor, professional treatment may be necessary, especially when urine has penetrated the carpet backing or cushion. How to Remove Dog Poop, Feces, Vomit and Diarrhea from Carpet For poop or feces, remove the solid material first. Use a spoon, dull scraper or disposable tool and avoid grinding the material into the carpet. For vomit, allow any thick material to be removed before vacuuming dry residue and treating the remaining stain. Blot liquid rather than scrubbing. After removing the visible material, use a carpet-safe cleaner appropriate for the fiber. Some commercial enzyme-based products are specifically marketed for pet accidents, vomit and other organic stains, but always follow the product label and test first.  If diarrhea or vomit has soaked deeply into carpet padding, surface treatment may not be enough. How to Remove Red Wine, Tea and Juice Stains from Carpet For red wine, tea and fruit juice, immediately blot the liquid with a white absorbent towel. CRI recommends working gently from the edges toward the center and rinsing the area after the stain has been removed.  Do not pour large amounts of water onto the carpet. Overwetting can spread the stain and increase drying time. For orange juice, grape juice or other colored beverages, the same controlled blotting principle applies, but the appropriate cleaning chemistry can differ depending on the beverage and carpet fiber. How to Remove Oil, Paint, Rust and Turmeric Stains Oil-based stains should be treated differently from ordinary water-based spills. Blot excess oil first and use a carpet-safe product designed for grease or oil when appropriate. For paint, identify whether it is water-based or oil-based before choosing a treatment. Never automatically use a strong solvent without checking the carpet manufacturer’s instructions. Rust can be especially difficult […]

How to Clean Kitchen Cabinets | A Complete Guide for Wood, Grease, Painted & Laminate Cabinets
Uncategorized

How to Clean Kitchen Cabinets | A Complete Guide for Wood, Grease, Painted & Laminate Cabinets

How to Clean Kitchen Cabinets. Cooking oils, grease, fingerprints, food splashes, moisture and airborne grime can gradually leave cabinet doors sticky, dull or discolored. The right cleaning method depends on whether your cabinets are wood, painted, laminate, stained or another finished material, because an aggressive cleaner can damage the surface you are trying to protect. For most finished cabinets, a gentle approach works best: remove loose dust, use a small amount of mild cleaner on a soft microfiber cloth, clean in manageable sections, and dry the surface afterward. Lowe’s similarly recommends a mild dish-soap solution for many wood cabinets and advises applying the cleaner to the cloth rather than directly to the cabinet.  What Is the Best Way to Clean Kitchen Cabinets? The best general method is to start with the least aggressive cleaning solution that can remove the dirt. For routine cleaning, warm water and a small amount of mild dish soap are usually a practical starting point for finished, washable surfaces. Do not soak cabinet doors, especially wood. Excess moisture can enter seams and contribute to swelling or finish problems. Lowe’s specifically recommends using a damp rather than wet microfiber cloth and avoiding direct spraying onto wood cabinets.  Before cleaning the entire kitchen, check the cabinet manufacturer’s care instructions and test the chosen cleaner in a hidden area. This is particularly important for older cabinets, specialty finishes and painted surfaces. 15-Step Kitchen Cabinet Cleaning Routine A consistent routine makes it easier to clean cabinets without unnecessarily exposing the finish to harsh chemicals or excessive moisture. How to Clean Wood Kitchen Cabinets Without Damaging the Finish Wood cabinets need a balance between effective cleaning and moisture control. Finished wood can generally tolerate gentle cleaning, but excessive water, abrasive tools and harsh chemicals can affect the protective coating. Lowe’s recommends a mild dish-soap solution and microfiber cloth for wood cabinets, while also warning against harsh chemicals such as bleach and ammonia.  UGA Cooperative Extension likewise warns that ammonia may dissolve wood finishes and recommends working quickly, wiping with a damp not saturated sponge and drying the wood afterward.  For sticky areas, hold a damp soapy microfiber cloth against the spot briefly to loosen the residue rather than immediately scrubbing hard. This approach can help lift grime while reducing mechanical stress on the finish. How to Clean Kitchen Cabinets Grease and Sticky Buildup Grease is one of the most common reasons cabinets become sticky. Oil released during cooking can become airborne and settle on nearby cabinet surfaces, where it attracts dust and creates a heavier layer of grime.  For light grease, start with warm water and mild dish soap. Apply the solution to a microfiber cloth rather than flooding the cabinet. For a stubborn patch, allow the damp cloth to sit against the area briefly, then wipe gently. If ordinary cleaning does not work, choose a product specifically labeled for your cabinet’s material and finish. Lowe’s recommends testing stronger cleaning approaches first, while commercial cabinet cleaners are available specifically for finished wood and laminate surfaces.  How to Clean Painted Kitchen Cabinets Painted cabinets can be especially sensitive to aggressive scrubbing because the paint itself forms the visible finish. Start with a soft microfiber cloth and mild soapy water, then wipe away residue with a separate damp cloth. Avoid steel wool, abrasive powders, rough sponges and strong solvents unless the cabinet manufacturer specifically approves them. Even when a cleaner removes grease effectively, it can dull the painted surface or leave visible marks. For white painted kitchen cabinets, clean frequently around handles and cooking areas because accumulated grease can make light-colored surfaces appear yellow or gray. If the discoloration is actually caused by an aging or damaged finish rather than surface dirt, ordinary cleaning may not restore the original color. How to Clean White Kitchen Cabinets That Have Yellowed Yellow-looking white cabinets do not always mean that the surface simply needs stronger cleaning. Cooking grease, smoke, dust and residue can contribute to discoloration, but some finishes can also change appearance with age or environmental exposure. Start with gentle cleaning rather than immediately reaching for bleach or abrasive products. Lowe’s advises against harsh chemicals such as bleach and ammonia on wood cabinets because they can damage the protective finish.  If cleaning removes the surface residue but the cabinet remains yellow, the issue may involve the paint or finish itself. In that situation, refinishing may be more appropriate than repeatedly applying stronger cleaners. How to Clean Laminate Kitchen Cabinets Laminate cabinets are generally easier to maintain than many unfinished wood surfaces, but the edges, seams and substrate still need protection from excess moisture. For routine cleaning, use a soft cloth with warm soapy water and wipe away residue afterward. UGA’s stain-removal guidance also lists laminated kitchen and bathroom cabinets among surfaces that can be cleaned with warm sudsy water, followed by rinsing and drying.  For stubborn grease, use a cleaner specifically labeled for laminate if ordinary dish soap is insufficient. Do not assume that a powerful degreaser suitable for metal or appliances is automatically safe for laminate cabinetry. How to Clean Kitchen Cabinets with Vinegar Vinegar is frequently suggested for kitchen cleaning, but it should not automatically be treated as the safest option for every cabinet finish. Some modern finishes or manufacturer instructions may specifically advise against acidic or vinegar-based cleaners. Martha Stewart’s current guidance describes a diluted white-vinegar-and-water mixture with a small amount of dish detergent for suitable wood cabinets, while emphasizing patch testing and avoiding excessive moisture.  The important point is compatibility. If your cabinet manufacturer prohibits vinegar, use the recommended cleaner instead. Never assume that a natural ingredient is harmless to every finish. How to Clean Inside Kitchen Cabinets Cleaning the inside of cabinets is often overlooked, but shelves can collect crumbs, dust, spills and sticky residue over time. Start by removing all dishes, food containers and other items. Vacuum loose crumbs and dust from corners before using any damp cloth. Then wipe shelves and interior walls with a lightly damp […]

How to Remove Oil Stains from Fabric | Easy Methods for Clothes, Upholstery & More
Uncategorized

How to Remove Oil Stains from Fabric | Easy Methods for Clothes, Upholstery & More

How to Remove Oil Stains from Fabric. Instead of simply rinsing away, oily residue can cling tightly to textile fibers and leave a darker or greasy-looking patch. This is why an ordinary wash cycle may not completely remove cooking oil, olive oil, coconut oil, or other greasy stains.  The right treatment depends on both the type of oil and the fabric. A washable cotton shirt can usually be pre-treated and laundered, while silk, wool, satin, rayon, or dry-clean-only materials require much more caution. Upholstery also needs a controlled approach because excessive moisture can damage backing or create a visible water ring.  Why Are Oil Stains So Difficult to Remove from Fabric? Oil and grease are lipids, so they tend to resist water and attach themselves to fabric fibers. Simply rinsing an oily mark with water may therefore leave most of the stain behind. Detergents work more effectively because surfactants help surround and lift oily soil so it can be carried away during washing.  Fresh oil stains are generally easier to treat because there has been less time for the oil to penetrate the material. However, even an older or previously washed stain may still respond to appropriate pre-treatment. OxiClean notes that set-in grease and oil stains can sometimes still be removed after washing and drying.  The most important rule is to check the care label before treating the fabric. Some commercial stain removers are specifically unsuitable for silk, wool, leather, or dry-clean-only garments. Always test a product on an inconspicuous area first.  How to Remove Oil Stains from Fabric For ordinary washable fabric, begin by removing any excess oil without spreading it. If the spill is fresh and there is visible liquid or food residue, gently blot or lift it away with a clean absorbent material. Next, apply a suitable laundry pre-treatment or detergent directly to the stain. OxiClean recommends pre-treating grease and oil stains before washing and then laundering in the warmest water the garment can safely accept according to its care label.  For a simple household approach, some laundry guidance also uses liquid dishwashing detergent because it is formulated to cut grease. ARM & HAMMER, for example, recommends applying colorless liquid dish soap to grease stains and then rinsing before laundering.  15-Step Method for Removing Oil Stains from Washable Fabric Use this checklist for cotton, many polyester garments, denim, and other washable fabrics, provided the care label permits the treatment: Pretreatment is especially important for grease and oil because ordinary washing may not remove heavily attached oily residue in one cycle.  How to Get Rid of Oil Stains on Clothes If you’re wondering how to get rid of oil stains on clothes, the process is similar whether the source is cooking oil, olive oil, coconut oil, or another household oil. First remove excess material, then use a grease-cutting pre-treatment and wash according to the garment’s care instructions. For a fresh cooking-oil stain, don’t immediately soak the entire garment in water. Concentrate on the stained area first so the cleaning product can work directly on the oily residue. After washing, inspect the fabric under good lighting. An oil stain may appear as a darker patch even when the surface feels clean. If you can still see the mark, repeat treatment rather than relying on the dryer. Heat can be useful during an appropriate wash cycle, but dryer heat should not be used as a way to set or test a stain. ARM & HAMMER recommends checking a garment before drying and treating it again if the stain remains.  How to Remove Old or Set-In Oil Stains from Fabric Old oil stains can be more challenging because the oil may have penetrated deeply or become partially set. That does not necessarily mean the garment is beyond recovery. OxiClean states that set-in grease and oil stains can sometimes still be treated after a complete laundry cycle.  Start by applying a suitable stain remover designed for grease or oily stains. Follow the product’s recommended dwell time rather than leaving it on indefinitely. OxiClean’s current instructions recommend different treatment times depending on the product and stain severity.  For color-sensitive materials, always perform a hidden-area test first. Some stain removers can alter color or finish, and manufacturers specifically exclude certain delicate materials from their products. If the garment is expensive, vintage, delicate, or labeled dry clean only, professional cleaning is a safer option than experimenting with household remedies. How to Remove Cooking Oil Stains from Fabric Cooking oil can leave a translucent or dark greasy mark on shirts, table linens, aprons, and other fabrics. Remove excess oil first, then apply a suitable laundry pre-treatment. A grease-cutting liquid detergent can help loosen oily soil. After treatment, wash the garment according to its care label. OxiClean recommends using the warmest water the fabric safely accepts for its grease-stain treatment, while emphasizing that the manufacturer’s garment instructions take priority.  For olive oil stains, coconut oil stains, or similar food oils, the same general principle applies: remove excess oil, pre-treat, wash, inspect, and repeat if necessary. Don’t assume that natural oils are easier to remove simply because they come from food. They can still bind strongly to fabric fibers. How to Remove Oil Stains from Nylon and Polyester Fabric Nylon and polyester are synthetic fibers, but that does not mean every stain remover is automatically safe for them. Always check the garment label and the cleaning product’s permitted fabrics. For washable polyester or nylon, pre-treat the oily area with a compatible stain remover or detergent and wash according to the label. If the garment is colorfast and the product permits it, a specialized stain remover may provide additional cleaning power.  Avoid assuming that stronger chemicals will produce better results. A product can remove oil while simultaneously damaging dye, coatings, elastic components, or the fabric’s finish. How to Remove Oil Stains from Silk, Satin, Rayon & Other Delicate Fabrics Delicate fabrics require a different strategy. Silk, satin, rayon, sheer fabrics, and some crepe materials can be damaged by […]

How to Remove Egg Stains | Easy Methods for Clothes, Pans, Walls & More
Uncategorized

How to Remove Egg Stains | Easy Methods for Clothes, Pans, Walls & More

Egg stains can be surprisingly stubborn because an egg contains proteins and fats that can cling to fabric and porous surfaces. Fresh egg is usually easier to remove than dried egg, but the cleaning method matters. In particular, hot water can cause egg proteins to coagulate, making the residue harder to remove from some materials. Ariel specifically recommends cold water for fresh egg stains on clothing for this reason.  Whether you need to know how to remove egg stains from clothes, clean egg from a pan, or remove splattered egg from a wall, car, or brickwork, the first step is to avoid spreading the mess. Remove the excess gently, choose a cleaner appropriate for the surface, and test unfamiliar products before treating a large area. Why Are Egg Stains Difficult to Remove? Egg stains are different from many ordinary food stains because they contain both protein and fat. When egg dries, the protein can form a stubborn residue that adheres to fibers or porous surfaces. On carpet and upholstery, liquid can also penetrate below the visible surface, making the affected area larger than it initially appears.  Temperature is particularly important when cleaning egg. Several stain-removal sources advise avoiding hot water on egg because heat can coagulate the proteins. Cold or appropriately lukewarm water is generally a safer starting point for fresh egg contamination, especially on textiles.  The age of the stain also matters. Fresh egg can often be removed before it dries, while old egg may need gentle scraping and repeated treatment. Vanish recommends scraping dried egg carefully with the side of a spoon before applying a suitable stain-treatment product.  How to Remove Egg Stains from Clothes If raw egg, egg white, or egg yolk gets onto clothing, start by removing any excess without rubbing it deeper into the fibers. Ariel recommends scraping off excess material and rinsing the garment under cold running water before pre-treating it with detergent.  Once the excess has been removed, apply a suitable liquid laundry detergent or fabric-safe stain remover. Work gently and follow the product instructions. For washable clothing, wash using the temperature permitted by the garment’s care label. Ariel’s egg-stain instructions recommend washing at the hottest temperature indicated by the garment label after pre-treatment.  Always inspect the garment before putting it in the dryer. If the stain is still visible, repeat the appropriate treatment rather than using heat immediately. Tide similarly advises checking stained garments before drying because drying can set remaining stains.  15 Steps to Remove Egg Stains from Washable Clothes Use this checklist for shirts, T-shirts, trousers, uniforms, jeans, and other washable garments: For colored or delicate clothing, follow the manufacturer’s care instructions carefully. Vanish also recommends checking the garment label and testing its product on a small hidden area before use.  How to Remove Egg White and Egg Yolk Stains Egg white stains and egg yolk stains have slightly different appearances, but both should be treated as food/protein contamination rather than simply scrubbing them away. Egg white can dry into a relatively clear, sticky residue, while yolk can leave a more noticeable yellow mark because it also contains fat. For either type, remove excess egg first. Use cold water for a fresh clothing stain and then pre-treat with an appropriate laundry detergent. Ariel identifies egg as a protein stain and recommends an enzyme-containing detergent for breaking down egg proteins.  If the yolk has dried, carefully scrape away the hardened residue before treatment. Don’t use excessive force, because aggressive scraping can damage delicate fibers. For persistent discoloration, a fabric-specific stain remover can be used according to its instructions. Vanish recommends a suitable stain-removal treatment for both fresh and dried egg stains, with fabric testing beforehand.  How to Remove Dried Egg Stains Dried egg needs a little more patience because the residue has already hardened. Begin by carefully lifting the dried material with the edge of a spoon. Avoid sharp tools that could cut or pull textile fibers. For washable clothing, rinse or treat the area according to the garment’s care instructions and apply an appropriate detergent. Vanish specifically recommends scraping dried egg from clothing or carpet before beginning its stain-treatment process.  On carpet or upholstery, don’t immediately saturate the stain with water. Excess moisture can spread dissolved residue and create a larger ring when the material dries. James recommends testing a suitable stain product first and using controlled treatment rather than aggressive scrubbing.  How to Remove Egg Stains from Carpet and Upholstery Egg spilled on carpet or a sofa can be more challenging than egg on washable clothing because the liquid may penetrate the fibers. Start by removing loose or dried material with a spoon. For a fresh stain, James recommends using a clean white cotton cloth with water, while cautioning that the method should not be used where water could damage or discolor the material.  For dried stains, use a product specifically suitable for the carpet or upholstery and test it first in an inconspicuous location. Avoid aggressive scrubbing and excessive foaming, both of which can spread contamination and potentially leave rings.  Vanish also recommends blotting excess liquid from carpet, applying a suitable carpet-and-upholstery stain remover, and blotting with a clean absorbent cloth rather than simply rubbing the affected area.  How to Remove Egg Stains from a Pan If cooked or raw egg is stuck to a pan, allow the pan to cool before cleaning it. Remove loose pieces with a suitable spatula or scraper that will not damage the cookware’s surface. For ordinary cookware, soak the pan with warm water and an appropriate amount of dish detergent to soften the residue. A non-abrasive sponge can then be used to loosen remaining egg. Avoid aggressive metal tools on non-stick coatings. For cast iron, follow the manufacturer’s or cookware maker’s seasoning-care instructions rather than treating it like stainless steel or glass. The key is to soften the protein residue rather than burning or scraping it aggressively. If food is badly stuck, repeated soaking and gentle cleaning are generally safer than […]

How to Remove Dog Hair from Clothes | Easy Methods for Wash, Dryer & Home
Uncategorized

How to Remove Dog Hair from Clothes | Easy Methods for Wash, Dryer & Home

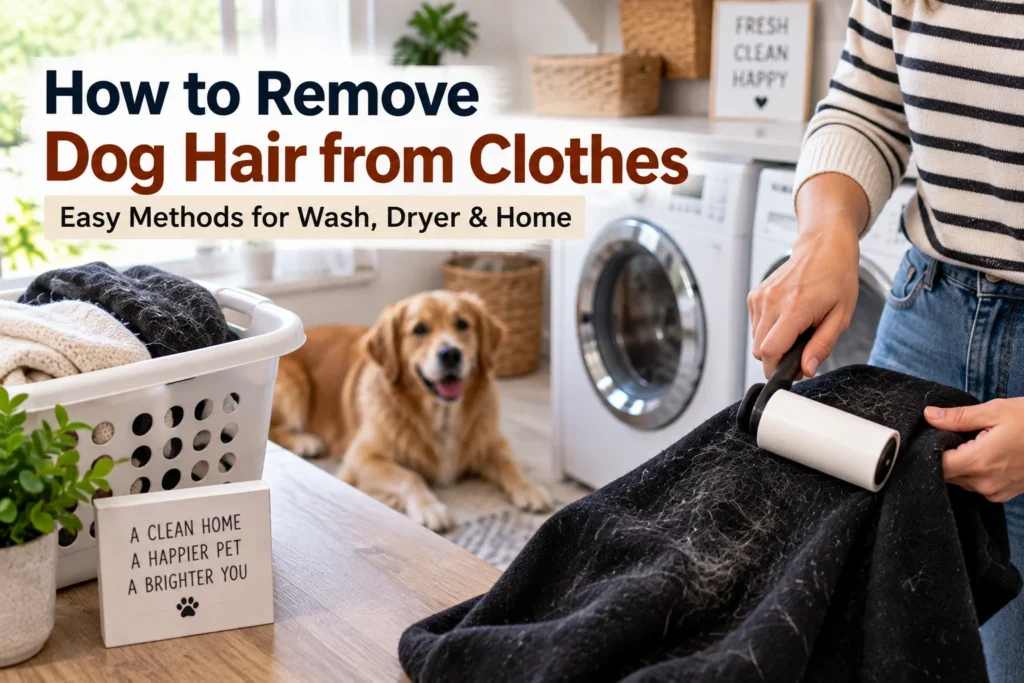
Dog hair can cling stubbornly to clothing, especially when static electricity and fabric texture cause individual hairs to become embedded in the fibers. Black clothes, woolen garments, blankets, and textured fabrics can make the problem particularly noticeable. The good news is that you can usually remove much of the hair before and during laundry by using the right combination of mechanical removal, drying, washing, and regular maintenance. If you’re looking for how to remove dog hair from clothes, the most important step is to avoid putting a heavily hair-covered garment directly into the washing machine whenever possible. Removing loose hair first can reduce the amount that ends up inside the washer and dryer. Speed Queen recommends a short no-heat dryer cycle before washing to loosen pet hair, while Hoover recommends pre-treating clothes with a lint roller or pet-hair brush.  Why Does Dog Hair Stick to Clothes? Dog hair doesn’t simply sit on the surface of clothing. It can become trapped between fibers, especially when fabrics generate static electricity or have a textured surface. ARM & HAMMER explains that static electricity from friction can make pet hair cling to clothing, while moisture can cause hair to clump and become woven into fibers.  Some fabrics naturally make pet hair more noticeable than others. Wool, for example, can generate static and provide plenty of places for hair to cling. ARM & HAMMER notes that silk, leather, denim, cotton, and microfiber can be comparatively more resistant to pet hair, although no fabric is completely hair-proof.  The amount of shedding also matters. A heavily shedding dog can leave substantially more hair on clothes, bedding, and furniture than a dog that sheds less. Regular grooming and cleaning the areas where your dog rests can therefore reduce the amount of hair reaching your wardrobe. How to Remove Dog Hair from Clothes The easiest approach is to remove as much loose hair as possible before washing. A lint roller is one of the simplest options for everyday clothing, while a slightly damp rubber glove can gather loose hairs into clumps that are easier to pick up. For larger amounts of hair, a pet-hair brush, rubber squeegee, or similar fabric-safe tool can loosen embedded fur. Rinse recommends using a lint roller, rubber gloves, or a rubber broom/squeegee before laundry.  If your clothes are heavily covered in hair, don’t immediately throw them into the washer. Speed Queen recommends using a 10-minute no-heat tumble cycle before washing so loose hair can be captured by the dryer’s lint filter.  15 Effective Ways to Get Dog Hair Out of Clothes Use the method that best matches the amount of hair and the fabric: These techniques work best when combined rather than relying on one method for every garment. Hoover similarly recommends lint rollers, damp rubber gloves, pet-hair brushes, and appropriate laundry practices for removing pet hair from clothes.  How to Remove Dog Hair from Clothes in the Dryer A dryer can be useful before washing, not only afterward. Speed Queen recommends putting pet-hair-covered clothes through a 10-minute tumble cycle with no heat. The idea is to loosen the hair so it can be collected by the lint filter before the clothes enter the washer.  After the no-heat cycle, remove the clothing and shake it out before washing. Clean the lint filter so the collected hair does not remain in the dryer. Some modern dryers also have dedicated pet-hair cycles. For example, Speed Queen’s Pet Plus system includes specific pet-hair-removal cycles, while its published instructions describe a dryer-first, washer-second process for suitable loads.  However, don’t use heat simply because a garment contains pet hair. Always follow the garment’s care label. Wool, delicate fabrics, and other heat-sensitive materials may require a different approach. How to Remove Dog Hair from Clothes When Washing If you’re wondering how to remove dog hair from clothes when washing, preparation is important. The washing machine isn’t always the best tool for removing large amounts of loose fur because wet hair can clump together and some of it may remain in the machine. Remove as much surface hair as possible first. Hoover recommends shaking clothes before washing and washing heavily pet-hair-covered items separately to reduce the spread of fur.  Use the correct detergent and wash cycle for the fabric. Some manufacturers also recommend specific laundry products or additives designed to help with pet hair, but these should always be compatible with the garment and washing machine. After the cycle, inspect the clothes before transferring them to the dryer. If substantial hair remains, remove it mechanically rather than repeatedly washing the same load. How to Remove Dog Hair from Clothes in the Washing Machine A washing machine can accumulate pet hair when heavily contaminated laundry is washed repeatedly. ARM & HAMMER notes that excess pet hair can build up in the washer, while Speed Queen recommends cleaning the machine when wet fur continues to accumulate.  After washing pet-hair-covered clothes, inspect the drum and any accessible filter according to the appliance manufacturer’s instructions. Wipe accessible surfaces with a cloth if loose hair is visible. Don’t assume that every washing machine has a removable filter that you can safely access. The design varies between models, so consult the manufacturer’s manual before opening or removing components. How to Remove Dog Hair from Clothes Without a Lint Roller You don’t need a lint roller to remove pet hair. A slightly damp rubber glove is one of the easiest alternatives. Run your gloved hand gently over the garment, and the hair should gather into small clumps that can be picked up. A rubber squeegee can also work on suitable sturdy fabrics. Rinse specifically recommends a rubber broom or squeegee for loosening pet hair before washing.  For small amounts of hair, ordinary adhesive tape can provide a quick alternative. Wrap the tape around your hand with the sticky side facing outward and press it gently against the fabric. Be more careful with delicate clothing. If the fabric is prone to pulling, snagging, pilling, or surface damage, test […]

How to Remove Coffee Stains | Easy Methods for Clothes, Teeth, Carpet & More
Uncategorized

How to Remove Coffee Stains | Easy Methods for Clothes, Teeth, Carpet & More

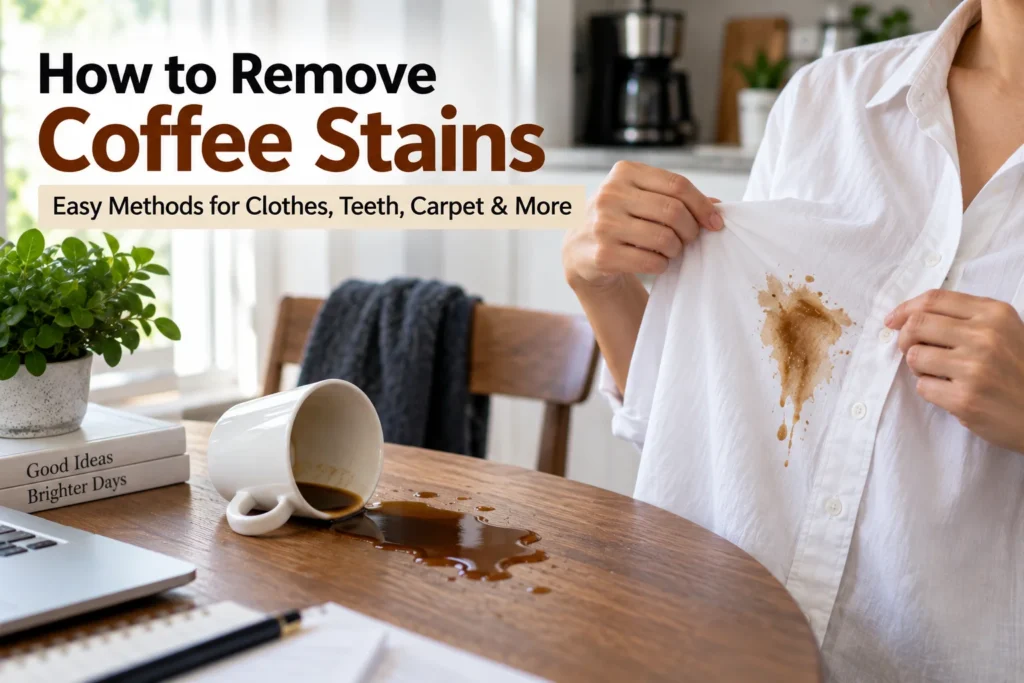
Coffee stains are common, but the best removal method depends on where the coffee spilled, how old the stain is, and what material was affected. A fresh coffee mark on a white shirt needs a different approach from a dried stain on jeans, carpet, marble, or upholstery. Acting quickly is usually helpful because older stains can become harder to remove. The American Cleaning Institute recommends treating clothing stains as early as possible and avoiding the dryer until the stain has disappeared.  This guide explains how to remove coffee stains from clothes, teeth, dentures, carpets, furniture, mugs, countertops, wood, walls, and other common surfaces. The methods below focus on practical cleaning principles, fabric-care instructions, and dental guidance rather than promising that every stain can be completely erased. How to Remove Coffee Stains Quickly For a fresh coffee spill, start by removing as much liquid as possible without spreading it. Blot rather than aggressively rubbing, because rubbing can push liquid deeper into fabric or enlarge the stained area. For washable clothing, cool water and an appropriate laundry pre-treatment are a useful starting point.  If the stain is on a delicate material, check its care label before applying any homemade cleaner. The University of Georgia’s textile guidance also recommends testing cleaning agents on an inconspicuous area first.  15 Quick Actions for a Fresh Coffee Spill A fresh stain is generally easier to deal with than a dried one. Use these steps as a practical checklist, adapting them to the surface involved. How to Remove Coffee Stains from Clothes For shirts, T-shirts, hoodies, jackets, jeans, linen, and other washable clothing, begin by blotting the coffee. Then rinse or sponge the area with cool water and pre-treat it with liquid laundry detergent or a suitable stain remover. The American Cleaning Institute specifically recommends cool-water treatment and pre-treatment for coffee and tea stains before laundering.  The University of Georgia gives similar guidance: promptly rinse or sponge coffee stains, pre-treat with an appropriate detergent, and launder according to the fabric’s care requirements. It also emphasizes checking the care label and testing cleaning agents first.  For white clothes or a white shirt, don’t automatically reach for chlorine bleach. Use only a bleaching product that the garment label permits. Oxygen-based stain removers may be appropriate for some fabrics, but product instructions and fabric compatibility should come first.  How to Remove Old, Dried, or Difficult Coffee Stains Old coffee stains may require more than one treatment because coffee and tea contain tannins that can become particularly stubborn after drying. Vanish notes that dried coffee and tea stains can be more difficult to remove and recommends pre-treatment followed by washing.  For old coffee stains from clothes, dried coffee stains, jeans, white T-shirts, linen, or hoodies, first soften the mark with water if the care label permits. Apply an appropriate stain treatment, allow it to work according to its instructions, and wash normally. Check the stain before using a dryer, because heat can make remaining discoloration more difficult to remove.  How to Remove Coffee Stains from Carpet, Sofa & Upholstery Coffee spilled on carpet or a sofa should be blotted as soon as possible. Don’t saturate the material unnecessarily. For carpets, the University of Georgia recommends blotting excess liquid, using a mild neutral detergent solution, rinsing with water, and blotting again. A diluted white-vinegar solution is also included in its guidance for certain coffee and tea stains.  This approach can also help explain how to remove coffee stains from a carpet, mattress, upholstery sofa, fabric car seat, or similar textile surface, but upholstery and mattresses require additional caution because excessive moisture can penetrate the padding. Always check manufacturer instructions first. For old dried coffee stains from carpet, repeated gentle treatment may be necessary. Avoid aggressive scrubbing, especially on delicate carpet fibers, and use a commercial carpet cleaner when the manufacturer’s instructions call for one.  How to Remove Coffee Stains from Teeth and Dentures Coffee can cause extrinsic, or surface, tooth staining. The American Dental Association explains that coffee and tea are common sources of extrinsic discoloration because colored compounds can accumulate on enamel. Surface stains may be reduced through brushing with whitening toothpaste or professional cleaning, but whitening products do not necessarily change the natural internal color of a tooth.  If you’re wondering how to remove coffee stains from teeth quickly or naturally, avoid harsh DIY acids, abrasive powders, or unproven whitening tricks. The ADA recommends ordinary oral-hygiene habits such as brushing twice daily, cleaning between the teeth, limiting staining drinks, and discussing whitening products with a dentist.  Coffee-related discoloration can also be associated with other factors, including plaque, aging, tobacco use, and intrinsic tooth changes. If discoloration is persistent, uneven, painful, or doesn’t respond to normal cleaning, a dental professional can determine the cause.  For dentures, use a denture-specific or non-abrasive cleaning approach rather than treating them like ordinary natural teeth. The ADA recommends daily cleaning and warns against hot or boiling water because dentures can warp.  How to Remove Coffee Stains from Mugs, Cups & Coffee Pots Coffee can leave brown residue inside mugs, cups, plastic containers, pots, filter baskets, and coffee equipment. For many hard, washable surfaces, begin with warm soapy water and a soft sponge. For stubborn stains on suitable ceramic, glass, enamel, or similar surfaces, the University of Georgia lists baking soda on a soft damp cloth as an option for old coffee or tea stains. Rinse thoroughly afterward.  For a coffee pot, percolator, or coffee maker, distinguish between removing stains from the removable vessel and cleaning the machine itself. Mr. Coffee’s cleaning guidance uses diluted white vinegar for mineral buildup inside compatible coffee makers, followed by multiple water-only cycles to rinse away the vinegar.  How to Remove Coffee Stains from Wood, Marble & Walls Different hard surfaces need different treatment. For wood, remove spilled coffee quickly and use only a small amount of appropriate cleaning solution because prolonged moisture can damage the finish or material. University of Georgia guidance recommends blotting the spill, using detergent […]

How to Clean a Sink Drain | Remove Odors, Hair, Grease & Clogs
Uncategorized

How to Clean a Sink Drain | Remove Odors, Hair, Grease & Clogs

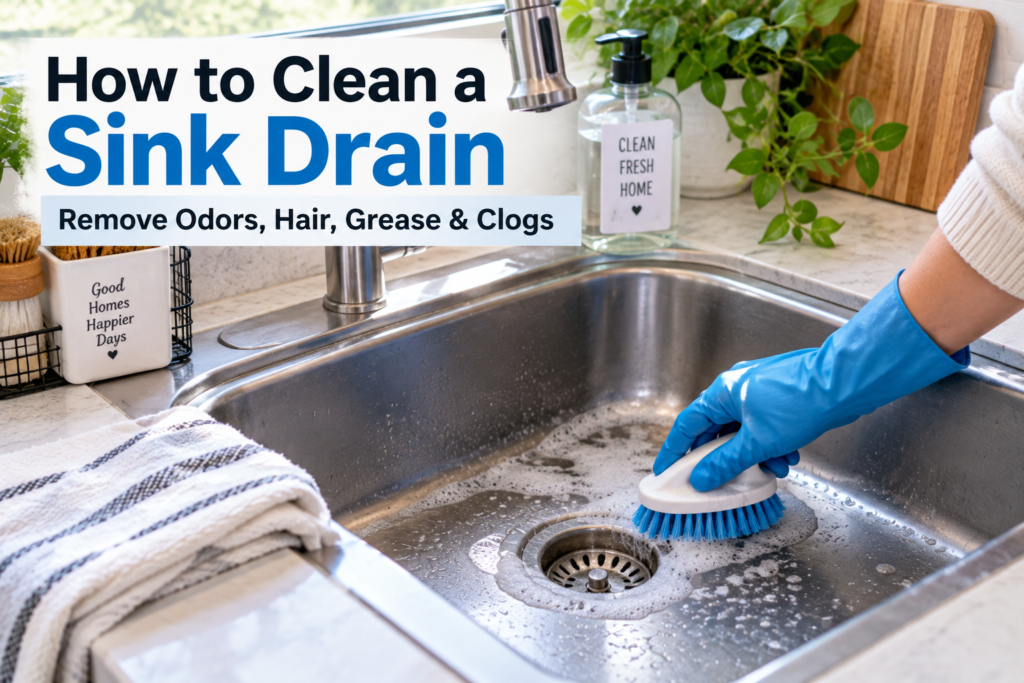
A sink drain collects more than just water. Over time, hair, soap residue, grease, food particles, toothpaste, and other debris can build up inside the drain, causing slow drainage, unpleasant smells, gurgling, or eventually a complete blockage. Regular cleaning can help prevent these problems and keep water flowing properly. The best way to clean a sink drain depends on the problem. A smelly drain may need surface and drain-opening cleaning, while a clogged drain may require a plunger or cleaning the U-bend. For a deeper blockage, simply pouring a homemade solution down the drain may not be enough. Recent guidance from Which? recommends starting with straightforward methods such as plunging and then checking the U-bend when a blockage persists.  What Causes a Sink Drain to Smell or Become Blocked? A dirty sink drain can develop problems when organic material, grease, soap residue, and other debris remain inside the pipe. In a kitchen, food particles and grease are common contributors, while bathroom sinks frequently collect hair, toothpaste, soap, and personal-care residue. A bad smell can be an early warning sign that material is trapped somewhere in the drainage system. Other warning signs include slow drainage and gurgling sounds, which can indicate restricted airflow or developing blockage. Which? identifies unpleasant odors, gurgling, and increasingly slow drainage as common signs of a blocked drain.  Before cleaning, remove visible debris around the drain opening and stopper. If water is standing in the sink, remove as much as practical before attempting to work on the drain. How to Clean a Sink Drain Step by Step Start with the simplest cleaning method before moving to more involved drain work. Remove visible debris, clean the stopper, flush appropriate residue from the opening, and then address odors or buildup. For a routine clean, baking soda and vinegar are commonly recommended by household-cleaning sources, although the chemistry and effectiveness of this combination are debated. BISSELL, for example, says its chemists do not endorse the combination because the acid-base reaction can largely neutralize the individual ingredients.  If you use a commercial drain product, follow its label carefully. Never combine commercial drain cleaners with other cleaning chemicals. 15 Steps for a Basic Sink Drain Cleaning Routine Use this checklist for routine maintenance before assuming you have a serious blockage: For a genuine blockage, cleaning the opening alone may not solve the problem because debris can be sitting farther down the pipe. In that situation, move on to plunging or cleaning the trap rather than repeatedly pouring substances into the drain. How to Clean a Sink Drain With Baking Soda Baking soda is frequently suggested for routine sink-drain cleaning because it can help loosen some surface residue and neutralize odors. Several current cleaning guides recommend combining baking soda with white vinegar and then flushing the drain with hot water.  However, this method should not be presented as a guaranteed way to dissolve a serious clog. BISSELL specifically notes that combining baking soda and vinegar produces a reaction that can cancel out the properties of the individual ingredients.  If your goal is simply to freshen a mildly dirty drain, a measured baking-soda-and-vinegar treatment is one commonly used household option. If the sink is completely blocked, mechanical removal with a plunger or trap cleaning is generally more appropriate. How to Clean a Smelly Sink Drain A smelly sink drain usually needs more than simply masking the odor. Food particles, grease, hair, soap residue, or stagnant material may be sitting inside the drain. Begin by cleaning the stopper and drain opening. Remove anything you can safely reach, then flush the drain. If the smell returns quickly, investigate the trap rather than repeatedly adding fragrance or cleaning products. In a kitchen sink, avoid sending grease, oil, and coffee grounds down the drain because they can contribute to buildup. Martha Stewart specifically recommends avoiding grease, oil, and coffee grounds and notes that organic material trapped in a dirty drain can also contribute to drain-fly problems.  For persistent sewage-like odors, recurring backups, or drainage problems that return after cleaning, professional inspection may be necessary. How to Clean a Kitchen Sink Drain Kitchen drains commonly deal with grease, food residue, soap, and other particles. Regular maintenance can therefore help prevent buildup before it develops into a blockage. Start by removing food debris from the sink and drain opening. Clean the stopper or strainer separately, then flush the drain with an appropriate cleaning method. A plunger can be useful when water is draining slowly, provided you create a good seal. Martha Stewart recommends a routine baking-soda-and-vinegar treatment for kitchen drains, while also advising against sending grease, oil, coffee grounds, bleach, ammonia, or harsh chemical cleaners down the drain.  If your kitchen sink has a garbage disposal, follow the disposal manufacturer’s instructions. Turn the unit off before physically cleaning accessible parts, and never put your hands into an operating disposal. How to Clean a Bathroom Sink Drain Bathroom sink drains commonly collect hair, soap scum, toothpaste, shaving residue, and other personal-care debris. Because hair can form a physical obstruction, chemical or homemade solutions may not remove the underlying problem. Start by removing the stopper. Pull out any visible hair and buildup, then clean the stopper thoroughly. If the water remains slow, use a sink plunger with an appropriate seal. If you are dealing specifically with how to clean hair out of a bathroom sink drain, mechanical removal is often more direct than repeatedly pouring liquids into the pipe. For a deeper obstruction, inspect and clean the trap if you are comfortable doing so. How to Clean a Sink Drain Trap The sink trap, often called the U-bend, is designed to retain water and help prevent sewer odors from entering the room. However, debris can also accumulate inside it. If a sink remains blocked after simpler methods, cleaning the trap may remove the material responsible. Which? recommends placing a bucket underneath the U-bend before disconnecting it, because water and trapped debris can spill out. It then recommends cleaning the trap with […]

How to Remove Peanut Butter Stains | Easy Ways to Clean Clothes, Fabric & More
Uncategorized

How to Remove Peanut Butter Stains | Easy Ways to Clean Clothes, Fabric & More

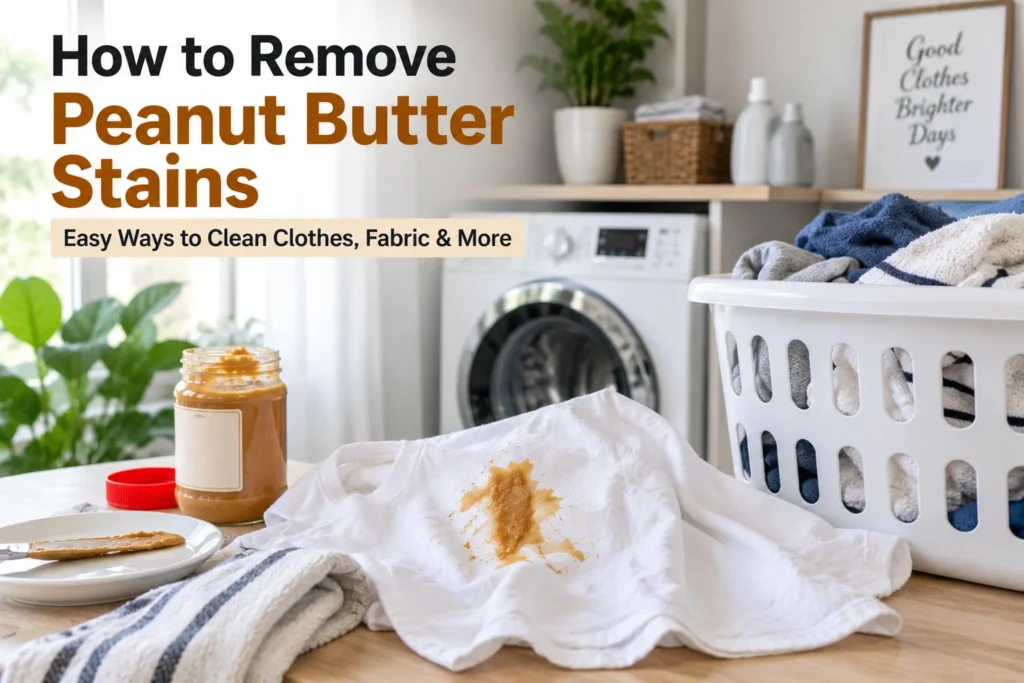
Peanut butter is a delicious food, but its combination of oil, protein, and sticky residue can make spills surprisingly difficult to clean. If peanut butter gets onto a shirt, jeans, carpet, sofa, or another surface, scraping and treating the stain correctly can prevent it from spreading deeper into the material. For washable clothing, the University of Georgia recommends removing excess peanut butter, pre-treating the stain, and laundering according to the fabric’s care instructions.  The key is to deal with the greasy portion first rather than simply soaking the stain in water. This guide explains how to remove peanut butter stains, including peanut butter oil stains from clothes, while also covering carpets and other common surfaces. The exact method should always be adjusted for the material and its manufacturer’s care instructions. Why Are Peanut Butter Stains So Difficult to Remove? Peanut butter does not behave like an ordinary water-based food stain. Its oily consistency can spread through textile fibers, while thicker particles can remain attached to the surface. This is why simply wiping the area with water may leave a greasy mark behind. Fresh peanut butter is usually easier to treat because less oil has had time to penetrate the material. Once the stain has been washed incorrectly or exposed to significant heat, removing the remaining oily residue can become more difficult. The first step should therefore be physical removal of excess peanut butter. The Carpet and Rug Institute similarly recommends gently scraping semi-solid peanut butter from carpet rather than rubbing it into the fibers.  For clothing, a pre-wash stain remover or suitable detergent can then help break down the remaining residue. UGA specifically lists peanut butter among oil-based food stains and recommends scraping away the excess followed by pre-treatment and laundering.  How to Remove Peanut Butter Stains from Clothes If peanut butter has landed on a shirt, T-shirt, hoodie, jeans, uniform, or another washable garment, start by carefully removing the excess. Use the edge of a spoon or a dull knife and work gently so you don’t push the peanut butter further into the fibers. After scraping, apply a suitable pre-wash stain remover or liquid laundry detergent to the affected area. Work according to the product’s instructions and check the garment care label before washing. UGA’s textile guidance specifically recommends pre-treating peanut butter stains with a pre-wash soil and stain remover before laundering.  Avoid automatically using the hottest available water. The appropriate washing temperature depends on the garment, the care label, and the cleaning product. Most importantly, inspect the garment after washing and before drying it with heat. If an oily shadow remains, treat it again rather than immediately applying more heat. 15 Steps for Removing Peanut Butter from Washable Fabric Use this checklist when dealing with a peanut butter stain on ordinary washable clothing: UGA also advises testing cleaning products on an inconspicuous area and following the care label rather than using a treatment that the fabric manufacturer prohibits.  How to Remove Peanut Butter Oil Stains A peanut butter oil stain can remain after the visible food has been removed. This happens because peanut butter contains oil that can penetrate fibers and leave behind a darker or translucent-looking mark. Start by removing any solid residue. Then apply a grease-cutting laundry product or an appropriate pre-wash stain remover to the affected area. For washable garments, laundering after pre-treatment is the standard approach recommended by textile-care guidance.  If the stain remains after washing, don’t assume it is permanent after one attempt. Repeat the appropriate treatment while following the garment’s care instructions. Avoid drying the item with heat until you are satisfied that the oil mark has disappeared. For delicate or valuable garments, particularly materials such as silk, wool, structured clothing, or garments labeled dry clean only, professional cleaning may be safer than experimenting with household products. How to Remove Peanut Butter Stains from Carpet Carpet requires a different approach because excessive water or aggressive rubbing can spread the stain and potentially affect the carpet backing. The Carpet and Rug Institute recommends acting quickly, gently scraping semi-solid peanut butter, and testing cleaning solutions in an inconspicuous area before treating the visible stain.  First, carefully lift away as much peanut butter as possible using a rounded spoon or another non-sharp tool. Don’t grind the residue into the carpet fibers. Next, apply a small amount of an appropriate carpet-cleaning solution to a white cloth, rather than flooding the carpet. Gently work from the outside toward the center and blot. The Carpet and Rug Institute recommends repeating the treatment as long as residue transfers to the cloth and then rinsing with cold water and blotting the area dry.  For expensive, delicate, or heavily stained carpeting, follow the carpet manufacturer’s recommendations or contact a professional cleaner. How to Remove Peanut Butter from Upholstery and Other Surfaces Peanut butter can also land on sofas, chairs, mattresses, tables, floors, walls, and other household surfaces. The safest approach depends heavily on the material. A method suitable for washable fabric should not automatically be used on wood, stone, finished furniture, or upholstery. For upholstery, remove excess peanut butter without rubbing. Use a compatible upholstery-cleaning method and avoid excessive moisture. UGA warns that overwetting upholstery can cause problems with finishes and padding, so controlled application is important.  For hard surfaces such as some tile, plastic, or finished furniture, UGA recommends removing excess peanut butter and using warm sudsy water with an appropriate cloth or sponge, followed by clean-water rinsing and drying.  Always test a cleaning solution first if the manufacturer’s instructions permit spot testing. This is particularly important for colored upholstery, finished wood, natural stone, and specialty surfaces. What Mistakes Should You Avoid When Removing Peanut Butter? Peanut butter stains often become worse because of incorrect first treatment. Rubbing vigorously can push the oily food farther into fabric, while excessive water can spread the stain on carpet or upholstery. Another common mistake is treating the stain without checking the material. Cleaning instructions for cotton clothing, wool, carpet, upholstery, wood, and […]

How to Remove Honey Stains | Easy Methods for Clothes, Carpet & Fabric
Uncategorized

How to Remove Honey Stains | Easy Methods for Clothes, Carpet & Fabric

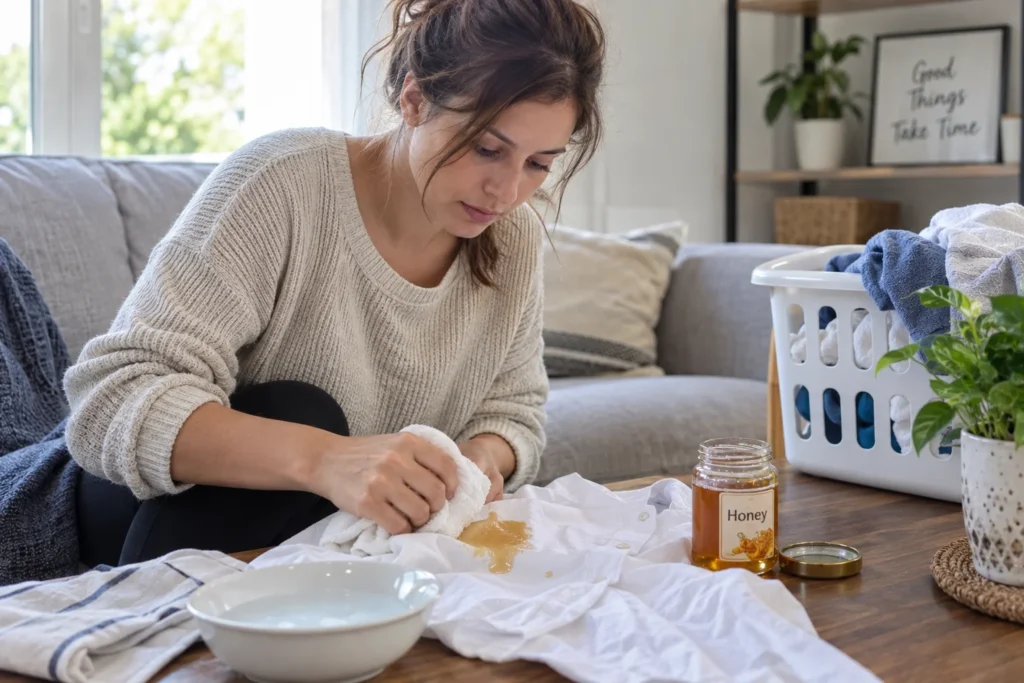
Honey is sticky, sugary, and surprisingly difficult to clean once it dries. A fresh spill can usually be removed fairly easily, but dried honey may leave behind a tacky residue that attracts dirt and creates a noticeable mark. The key is to remove as much of the honey as possible before treating the remaining stain. If you’re wondering how to remove honey stains from clothes, the safest approach is to scrape away excess honey, rinse or pre-treat the area appropriately, and then wash according to the garment’s care label. For carpets and upholstery, the process is different because excessive moisture and aggressive scrubbing can damage fibers or spread the stain. The Carpet and Rug Institute recommends scooping semisolid food spills, blotting rather than scrubbing, and testing carpet-cleaning products before use.  Why Honey Stains Can Be Difficult to Remove Honey is primarily a concentrated sugar solution, which makes it highly sticky. When fresh honey gets onto fabric, simply wiping it can spread the sticky material across a larger area. Once it dries, the residue becomes harder and may attract dust or other particles. The first priority is therefore physical removal rather than immediately adding lots of water. Scraping or scooping removes the bulk of the material without forcing it deeper into the fibers. For washable fabrics, stain-treatment guidance recommends following the garment’s care label and testing cleaning products on an inconspicuous area first. These precautions are particularly important for colored or delicate fabrics. Carpet requires similar care. The Carpet and Rug Institute specifically advises scooping semisolid food spills and avoiding scrubbing because brushing or aggressive rubbing can damage carpet texture.  How to Remove Honey Stains from Clothes When honey spills onto a shirt, T-shirt, dress, jeans, hoodie, or other washable garment, start by removing the excess. Use the edge of a spoon or another dull tool to gently lift the honey from the fabric. After removing the bulk of the spill, rinse or sponge the affected area according to the garment’s care instructions. A suitable liquid laundry detergent or pre-wash stain remover can then be used to treat the remaining discoloration. UGA textile guidance emphasizes reading the care label and pretesting cleaning agents before treating stains.  Don’t automatically use a strong chemical simply because the stain looks stubborn. Different fibers and dyes react differently to cleaning agents, and a product that works on one garment can damage another. If the garment is labeled dry clean only, professional cleaning is generally the safer option. 15-Step Honey Stain Removal Checklist for Fabric Use these steps as a practical guide for washable clothing while adapting them to the garment’s care label: Following the care label is particularly important because stain-removal procedures aren’t universally suitable for every fabric. UGA recommends both checking care instructions and pretesting cleaning agents for colorfastness.  How to Remove Dried Honey Stains Dried honey can be more frustrating because the sticky material has hardened onto the surface. Instead of immediately scrubbing the area, first loosen the residue carefully. For washable fabric, gently scrape away hardened honey with a dull edge. You can then use an appropriate stain-treatment product and launder the garment according to its care instructions. If a visible mark remains, repeat the treatment rather than assuming that one washing cycle will remove everything. Avoid applying unnecessary heat while a stain is still present. Checking the fabric after washing gives you an opportunity to treat any remaining residue before it becomes harder to address. For carpet, dried pieces can often be carefully removed mechanically before the remaining spot is treated. The Carpet and Rug Institute notes that solid, dried bits can be vacuumed, while semisolids should be scooped up rather than rubbed into the carpet.  How to Remove Honey from Carpet Carpet needs a controlled approach because honey can work its way between fibers and excessive moisture can create additional problems. Start by removing as much honey as possible with a spoon or other suitable tool. For any remaining liquid or sticky residue, use a clean white absorbent cloth and blot rather than scrub. Colored towels can potentially transfer dye to damp carpet, so the Carpet and Rug Institute specifically recommends plain white absorbent materials.  Apply a suitable carpet-cleaning product according to its instructions and use only the amount necessary. The Carpet and Rug Institute recommends applying cleaner to a white cloth, working gently from the edges toward the center, and blotting rather than scrubbing.  After treatment, blot away excess moisture. If the carpet remains heavily stained or the material is delicate, consult the carpet manufacturer’s cleaning instructions or a professional cleaner. How to Remove Honey Stains from Upholstery Honey on a sofa, chair, mattress, or fabric car seat should be treated carefully because upholstery can contain layers of padding beneath the fabric. Too much liquid can move beyond the visible stain and create moisture-related problems. Begin by lifting away the excess honey. Don’t spread it by rubbing. Then check the upholstery manufacturer’s cleaning code or care instructions before applying a cleaning solution. Use a compatible upholstery product sparingly and blot the area with a clean cloth. Avoid soaking the fabric. UGA stain-removal guidance repeatedly warns about excessive moisture when treating upholstered materials because solvents and liquids can affect backing and padding.  For expensive furniture, antique upholstery, or materials such as delicate wool or specialty fabrics, professional cleaning may be preferable to experimentation. How to Remove Honey from Hard Surfaces Honey can also end up on countertops, tables, floors, walls, kitchen cabinets, or other hard surfaces. In these situations, the sticky residue is usually easier to remove, but the cleaning method still needs to match the surface. Start by wiping or scraping away the bulk of the honey. A soft cloth dampened with suitable warm water can then help dissolve remaining sugary residue on compatible washable surfaces. Avoid flooding unfinished wood, porous materials, or surfaces with vulnerable finishes. If you’re cleaning painted walls or finished furniture, test the cleaning method in a hidden area first. For specialty materials such […]

Scroll to Top